
Have you ever walked past a bakery and felt a little sad because the smell of fresh bread seemed off-limits to you? Many people who stop eating gluten feel like they are saying goodbye to their favorite treats forever. It can be frustrating to try a gluten-free recipe only to have it turn out dry, crumbly, or tasteless. You deserve a slice of warm, comforting banana bread that tastes just as good as the one from your childhood. This recipe is designed to give you that joy back.
Print
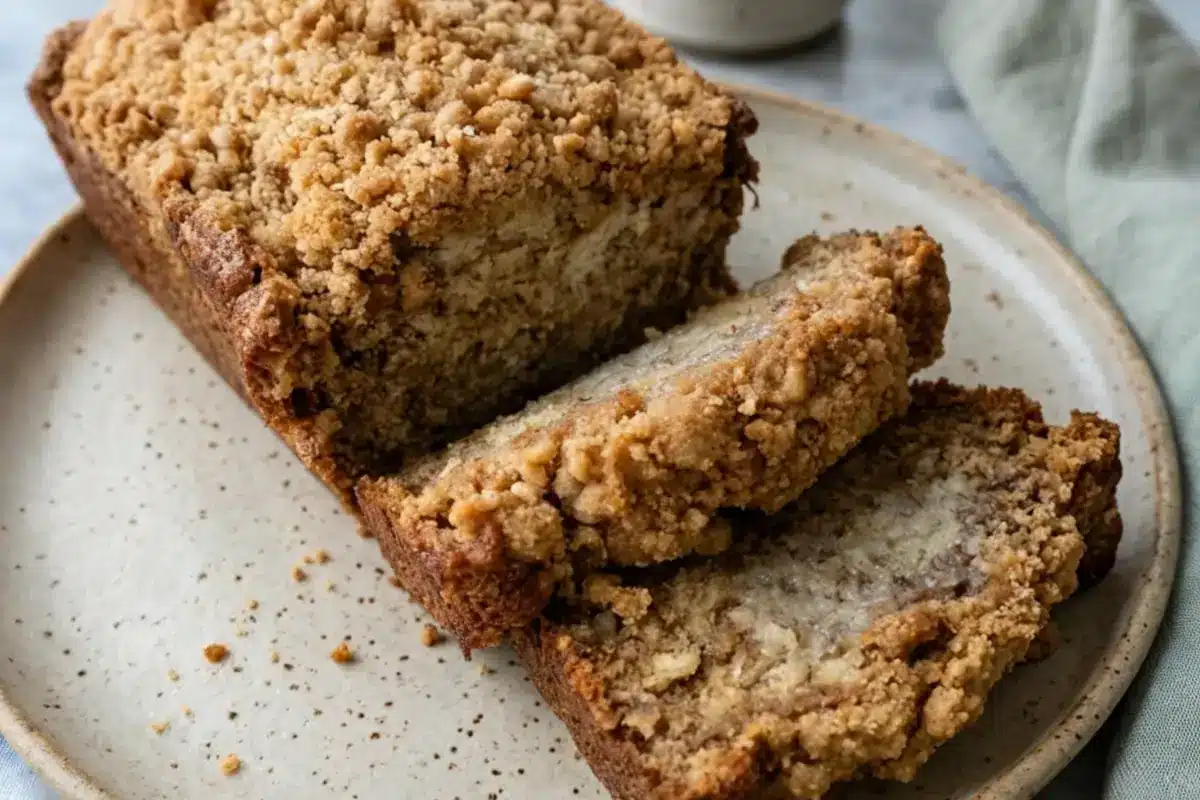
Walnut Gluten-Free Banana Bread
- Total Time: 75 minutes
- Yield: 1 loaf (10-12 slices) 1x
Description
This Walnut Gluten-Free Banana Bread is a cozy, comforting classic that doesn’t taste ‘gluten-free.’ It features a moist, soft crumb, sweet ripened bananas, and a satisfying crunch from raw walnuts. It’s a 100% safe and delicious treat for those with celiac disease or gluten sensitivities.
Ingredients
- 2 cups gluten-free all-purpose flour blend (with xanthan gum)
- 1 teaspoon baking soda
- 1/2 teaspoon salt
- 1/2 cup unsalted butter, melted and cooled
- 3/4 cup brown sugar
- 2 large eggs, room temperature
- 1 teaspoon pure vanilla extract
- 3 very ripe bananas, mashed (about 1.5 cups)
- 1/2 cup chopped raw walnuts
Instructions
- Preheat and Prep: Preheat your oven to 350°F. Grease an 8×4 inch loaf pan or line it with parchment paper for easy removal.
- Whisk Dry Ingredients: In a medium bowl, whisk together the 2 cups of gluten-free flour, 1 teaspoon of baking soda, and 1/2 teaspoon of salt. Set aside.
- Mix Wet Ingredients: In a large bowl, mash the 3 ripe bananas. Stir in 1/2 cup melted butter and 3/4 cup brown sugar. Add 2 eggs and 1 teaspoon vanilla extract, mixing until smooth.
- Combine: Slowly add the dry ingredients to the wet mixture. Stir gently until no white flour streaks remain; do not overmix.
- Add Texture: Fold in 1/2 cup chopped walnuts.
- Bake: Pour batter into the pan and bake for 55-65 minutes, or until a toothpick comes out clean.
- Cool: Let the bread rest in the pan for 10 minutes. Move to a wire rack to cool completely before slicing.
Notes
Ensure your flour blend includes xanthan gum to prevent crumbling. For a dairy-free version, substitute melted coconut oil for the butter. Measure flour by spooning it into the cup rather than packing it to keep the bread light.
- Prep Time: 15 minutes
- Cook Time: 60 minutes
- Category: Dessert/Breakfast
- Method: Baking
- Cuisine: American
Nutrition
- Serving Size: 1 slice
- Calories: 280
- Sugar: 18g
- Sodium: 210mg
- Fat: 14g
- Saturated Fat: 6g
- Unsaturated Fat: 7g
- Trans Fat: 0g
- Carbohydrates: 36g
- Fiber: 3g
- Protein: 4g
- Cholesterol: 55mg
This Walnut Gluten-Free Banana Bread is special because it does not taste “gluten-free.” Most people cannot even tell the difference. While some gluten-free breads feel like bricks, this one is moist and soft. The walnuts add a nice crunch that balances the sweetness of the bananas.
- Difficulty Level: Easy
- Time Requirement: 15 minutes to prep, 60 minutes to bake
- Dietary Safety: This recipe is 100% gluten-free. It is safe for people with celiac disease or gluten sensitivity.
The secret to this bread is using very ripe bananas and a high-quality gluten-free flour blend. If you can mash a banana, you can make this bread.
Essential Gluten-Free Ingredients
To make sure your bread is safe and delicious, you will need the following ingredients. Always check your labels to ensure they are certified gluten-free.
- 2 cups Gluten-Free All-Purpose Flour Blend: Look for a brand that already includes “xanthan gum.” This helps the bread stay together so it does not crumble.
- 1 teaspoon Baking Soda: This helps the bread rise.
- 1/2 teaspoon Salt: To balance the sweetness.
- 1/2 cup Unsalted Butter: This should be melted and cooled. For a dairy-free version, you can use melted coconut oil.
- 3/4 cup Brown Sugar: This makes the bread moist and gives it a deep flavor.
- 2 Large Eggs: Use room temperature eggs so they mix better.
- 1 teaspoon Vanilla Extract: Use pure vanilla for the best taste.
- 3 Very Ripe Bananas: These should have plenty of brown spots. You will need about 1 and 1/2 cups when mashed.
- 1/2 cup Chopped Walnuts: Ensure these are plain, raw walnuts to avoid any hidden gluten coatings.
Pro Tip: When shopping, look for the “GF” circle logo. This certification means the food has been tested and is safe for celiacs.
Step-by-Step Instructions

Follow these steps for a perfect loaf every time.
- Heat the Oven: Preheat your oven to 350 degrees Fahrenheit.
- Prepare the Pan: Grease an 8×4 inch loaf pan with butter or a gluten-free cooking spray. You can also line it with parchment paper to make it easier to lift out.
- Mix the Dry Ingredients: In a medium bowl, whisk together the 2 cups of gluten-free flour, 1 teaspoon of baking soda, and 1/2 teaspoon of salt. Set this aside.
- Mash the Bananas: In a large bowl, mash the 3 ripe bananas with a fork until they are smooth with only small chunks left.
- Mix the Wet Ingredients: Add the 1/2 cup of melted butter and 3/4 cup of brown sugar to the bananas. Stir well. Add the 2 eggs and 1 teaspoon of vanilla extract. Mix until smooth.
- Combine: Slowly pour the dry flour mixture into the wet banana mixture. Stir gently with a spoon. Do not overmix; just stir until you do not see any more white flour.
- Add the Crunch: Fold in the 1/2 cup of chopped walnuts.
- Bake: Pour the batter into your prepared pan. Bake for 55 to 65 minutes.
- The Toothpick Test: Stick a toothpick into the center of the loaf. If it comes out clean or with just a few crumbs, it is done.
- Cool Down: Let the bread sit in the pan for 10 minutes. Then, move it to a wire rack to cool completely.
Success Tip: Gluten-free flour can sometimes be dusty. When you measure your flour, use a spoon to scoop it into the measuring cup and level it off with a knife. Do not pack it down, or your bread will be too dry.
Assembly or Serving Suggestions
Serving this bread is the best part. For a beautiful look, you can save a few walnut halves and press them into the top of the batter before baking.
When you are ready to eat, cut a thick slice. It tastes wonderful when it is slightly warm. You can spread a little bit of butter or cream cheese on top. If you want a fancy snack, try drizzling a tiny bit of honey over a slice. It also pairs perfectly with a hot cup of tea or coffee in the morning.
Storage and Make-Ahead Tips
Gluten-free bread can dry out faster than regular bread, so storage is important.
- On the Counter: Wrap the cooled bread tightly in plastic wrap or put it in an airtight container. It will stay fresh for 2 to 3 days.
- In the Fridge: You can keep it in the fridge for up to 5 days, but it might get a little firm. Just pop a slice in the microwave for 10 seconds to soften it up.
- Freezing: This bread freezes beautifully. Wrap individual slices in plastic wrap and put them in a freezer bag. They will last for 3 months. To eat, let a slice thaw on the counter or toast it straight from the freezer.
Recipe Variations
You can change this recipe to fit your needs or what you have in your kitchen.
- Make it Vegan: Replace the 2 eggs with “flax eggs” (2 tablespoons of ground flaxseed mixed with 6 tablespoons of water). Use melted coconut oil instead of butter.
- Add Chocolate: If you love sweets, swap the walnuts for 1/2 cup of gluten-free chocolate chips.
- Banana Muffins: Instead of a loaf pan, pour the batter into a muffin tin. Bake for about 20 to 25 minutes. This is great for quick snacks on the go.
- Extra Protein: Stir in a tablespoon of chia seeds or hemp hearts for a little extra nutrition.
Conclusion
Living gluten-free does not mean you have to miss out on the foods that make you feel at home. This Walnut Gluten-Free Banana Bread is a simple way to bring a delicious, safe treat into your kitchen. Whether you are making it for yourself or for a friend who cannot have gluten, you can feel confident that it will be a hit.
We would love to hear how your bread turned out. Did you add chocolate chips, or did you stick with the walnuts? Tell us about it in the comments below.
FAQs Section
Can I use oat flour instead of the gluten-free flour blend? You can, but the texture will be different. Oat flour is heavier and might make the bread denser. If you use oat flour, make sure it is labeled “certified gluten-free,” as oats are often processed near wheat.
How do I keep this bread from crumbling? The main reason gluten-free bread crumbles is a lack of a binder. Make sure your flour blend contains xanthan gum. Also, letting the bread cool completely before slicing it helps the structure set so it stays together.
Why are my walnuts turning a weird color in the bread? Sometimes walnuts can turn a tiny bit purple or blue when they react with baking soda. This is totally normal and safe to eat. It does not change the flavor at all.
Is this recipe healthy? Bananas provide potassium and fiber, and walnuts have healthy fats that are good for your brain. Using a gluten-free recipe also helps avoid the digestive upset that many people feel when eating wheat.
How long does it take to prepare? It only takes about 15 minutes to mash the bananas and mix the ingredients. Most of the time is spent letting the oven do the work while your house starts to smell amazing.


