

Do you remember the last time you sat down at a holiday dinner and had to pass the bread basket without taking a single piece? For many of us living gluten-free, that moment can feel a little lonely. We miss the smell of fresh yeast, the warmth of a roll in our hands, and that soft, pillowy texture that soaks up gravy or melts butter. It often feels like we have to choose between our health and the foods we love.
The good news is that you do not have to settle for dense, dry, or crumbly bread anymore. You deserve a dinner roll that actually tastes like a dinner roll. Whether you have celiac disease, a gluten sensitivity, or you are just exploring a gluten-free lifestyle for a loved one, this recipe is here to bring the joy back to your dinner table. You are about to make the kind of rolls that your gluten-eating friends will reach for twice.
Print
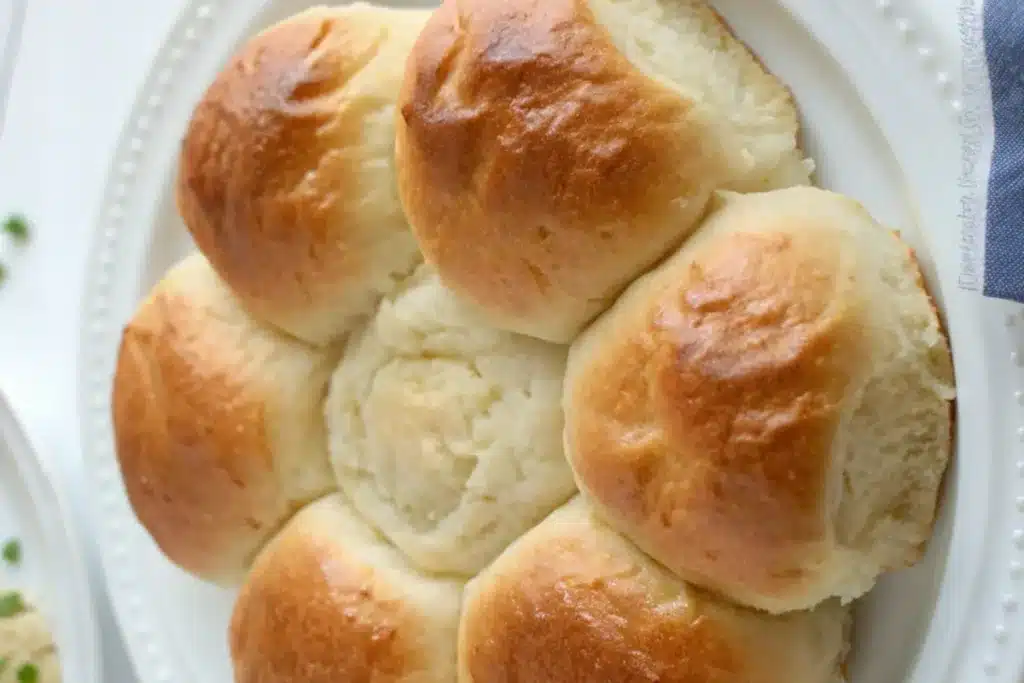
Amazingly Soft Gluten-Free Dinner Rolls – No One Will Know They’re GF!
- Total Time: 1 hour 45 minutes
- Yield: 9 servings 1x
Description
These pull-apart rolls are light, airy, and incredibly soft, solving the biggest problem in gluten-free baking: the texture. This recipe is 100% gluten-free and safe for celiac or gluten-sensitive readers.
Ingredients
- 1 Gluten-Free All-Purpose Flour Blend (with xanthan gum)
- 1 tablespoon Psyllium Husk Powder
- Warm Milk (cow’s milk or full-fat almond/cashew milk, ~110°F)
- Instant Yeast (certified gluten-free)
- Honey or Sugar
- Eggs (room-temperature)
- Melted Butter or Vegan Butter
- 1 teaspoon Apple Cider Vinegar
- Salt
Instructions
- Activate the Yeast: Combine warm milk, honey, and yeast in a small bowl; let sit for 5-10 minutes until foamy.
- Mix the Dry Ingredients: Whisk together gluten-free flour blend, salt, and optional psyllium husk powder.
- Combine All Ingredients: Add yeast mixture, melted butter, eggs, and apple cider vinegar to the dry ingredients.
- Mix Thoroughly: Use a stand mixer or hand mixer on medium-high speed for 3-5 minutes.
- Shape the Rolls: Scoop dough into a greased 9-inch pan; use wet fingers to smooth the tops.
- Rise: Cover and let rise in a warm, draft-free spot for 60 minutes.
- Bake: Preheat oven to 375°F and bake for 20-25 minutes.
- The Finish: Brush with melted butter or honey immediately after baking.
Notes
Ensure your flour blend contains xanthan gum or add it separately to avoid crumbling. For the best rise, verify that your milk is at 110°F to activate the yeast without killing it.
- Prep Time: 20 minutes
- Cook Time: 25 minutes
- Category: Side Dish
- Method: Baking
- Cuisine: American
Nutrition
- Serving Size: 1 roll
- Calories: 180
- Sugar: 4g
- Sodium: 210mg
- Fat: 6g
- Saturated Fat: 3g
- Unsaturated Fat: 2g
- Trans Fat: 0g
- Carbohydrates: 28g
- Fiber: 3g
- Protein: 4g
- Cholesterol: 35mg
This recipe is designed to solve the biggest problem in gluten-free baking: the texture. Most gluten-free breads feel like bricks, but these pull-apart rolls are light, airy, and incredibly soft. What makes this recipe special is the specific balance of moisture and starch, which mimics the “stretch” of traditional dough without using any wheat.
- Difficulty Level: Medium. If you can follow a list and use a hand mixer, you can make these.
- Prep Time: 20 minutes.
- Rise Time: 60 minutes.
- Bake Time: 20 to 25 minutes.
- Total Time: About 1 hour and 45 minutes.
This recipe is 100% gluten-free. It is safe for those with celiac disease or severe gluten intolerance. By making these at home, you have total control over your ingredients and can ensure there is no hidden gluten in your meal.
Essential Gluten-Free Ingredients
To get the best results, the quality of your ingredients matters. Gluten-free baking is a bit like a science project, so try not to swap these out unless noted.
- Gluten-Free All-Purpose Flour Blend: Look for a blend that contains xanthan gum. This is the “glue” that holds the bread together. Brands like King Arthur Measure for Measure or Cup4Cup work very well for bread.
- Psyllium Husk Powder: This is a secret weapon for gluten-free bread. It provides a chewy, bread-like structure. If your flour blend does not have it, adding a tablespoon can help the rolls rise better.
- Warm Milk: Use cow’s milk or a full-fat almond or cashew milk. It should feel like warm bathwater, around 110 degrees Fahrenheit. If it is too hot, it will kill the yeast.
- Instant Yeast: Always check the label to ensure it is certified gluten-free.
- Honey or Sugar: This feeds the yeast and helps the rolls brown beautifully in the oven.
- Eggs: Use room-temperature eggs. They provide the structure and “lift” needed for a fluffy roll.
- Melted Butter or Vegan Butter: This adds richness and flavor.
- Apple Cider Vinegar: A teaspoon of vinegar helps the yeast work better in gluten-free doughs, making the rolls lighter.
Certification Tip: Always look for the “Certified Gluten-Free” circle or square on your flour and yeast packages. This ensures the product was processed in a facility safe from cross-contamination.
Step-by-Step Instructions
Follow these steps carefully. Gluten-free dough looks different than wheat dough; it will be more like a thick cake batter or a sticky paste rather than a ball of dough you can knead by hand.
- Activate the Yeast: In a small bowl, combine your warm milk, honey, and yeast. Let it sit for about 5 to 10 minutes until it becomes foamy on top. If it does not foam, your yeast might be old, and you should start over with a fresh packet.
- Mix the Dry Ingredients: In a large mixing bowl, whisk together your gluten-free flour blend, salt, and any extra starches or psyllium husk if you are using them.
- Combine: Add the yeast mixture, melted butter, eggs, and apple cider vinegar to the dry ingredients.
- The Mixing Secret: Use a stand mixer or a hand mixer on medium-high speed for 3 to 5 minutes. Unlike wheat bread, you cannot over-mix gluten-free dough. Mixing it well helps the starches hydrate and creates a smoother texture.
- Shape the Rolls: Grease a 9-inch round cake pan or a square baking dish. Use a large scoop or a spoon to drop 8 to 9 mounds of dough into the pan. Lightly wet your fingers with water to smooth out the tops of the rolls.
- The Rise: Cover the pan with a clean, warm kitchen towel. Place it in a draft-free, warm spot (like inside an oven that is turned off). Let the rolls rise for about 60 minutes, or until they have nearly doubled in size and are touching each other.
- Bake: Preheat your oven to 375 degrees Fahrenheit. Bake for 20 to 25 minutes. The tops should be a deep golden brown.
- The Finish: Brush the tops with more melted butter or a little honey right when they come out of the oven for a soft, shiny crust.
Assembly or Serving Suggestions
These rolls are at their absolute best when served warm, about 10 minutes after they leave the oven. Because they are pull-apart style, you can place the entire baking dish in the center of the table and let everyone help themselves.
- Compound Butters: Serve these with a side of salted honey butter or a garlic herb butter spread.
- Holiday Mains: These are the perfect companion for a roast chicken, a holiday turkey, or a hearty beef stew.
- Classic Pairings: If you are having a lighter meal, serve these alongside a fresh garden salad or a bowl of creamy tomato soup. The soft texture is perfect for dipping.
Storage and Make-Ahead Tips
Gluten-free bread tends to dry out faster than traditional bread, but you can keep these fresh with a few simple tricks.
- Room Temperature: Store leftovers in an airtight container or a sealed plastic bag for up to 2 days.
- Reheating: To bring back that “just-baked” softness, wrap a roll in a damp paper towel and microwave it for 10 to 15 seconds. You can also wrap them in foil and pop them in a 300-degree oven for 5 minutes.
- Freezing: These rolls freeze beautifully. Once they are completely cool, wrap them individually in plastic wrap and place them in a freezer bag. They will stay fresh for up to 3 months. Thaw at room temperature and reheat as directed above.
- Make-Ahead: You can make the dough a day early and let it do its first rise in the refrigerator overnight. This actually develops more flavor in the bread.
Recipe Variations
You can easily adapt this base recipe to fit different tastes or dietary needs.
- Make it Vegan: Replace the milk with oat or almond milk, use a vegan butter substitute, and use a “flax egg” (1 tablespoon ground flaxseed mixed with 3 tablespoons water per egg). Note that vegan rolls may be slightly denser.
- Garlic and Herb Rolls: Mix 1 teaspoon of dried rosemary and 1/2 teaspoon of garlic powder into the dry flour blend before mixing.
- Cinnamon Sugar Rolls: Instead of savory dinner rolls, brush the tops with butter and sprinkle with cinnamon and sugar halfway through the baking process for a sweet brunch treat.
- Cheesy Rolls: Fold 1/2 cup of shredded sharp cheddar cheese into the dough during the final minute of mixing.
Conclusion
Baking without gluten does not have to be a struggle. With the right ingredients and a little bit of patience, you can create bread that makes you feel included and satisfied at every meal. These rolls are proof that gluten-free food can be just as delicious, soft, and comforting as the original versions we grew up with.
I hope these rolls become a staple in your kitchen and bring a smile to your family’s faces. If you try this recipe, please leave a comment below and let me know how they turned out! I would love to hear about any fun variations you created.
FAQs Section
Can I use oat flour instead of an all-purpose gluten-free blend? It is not recommended to use only oat flour. Oat flour is very dense and does not have the starches needed to make a fluffy roll. For the best texture, stick to a high-quality all-purpose gluten-free flour blend.
How do I keep my rolls from crumbling? Crumbling usually happens if there is not enough moisture or “binder” in the dough. Ensure your flour blend has xanthan gum. If it does not, you must add it separately. Also, do not skip the eggs, as they provide the essential structure that keeps the bread together.
Why didn’t my rolls rise? The most common reason is that the yeast was expired or the liquid used was too hot (which kills the yeast) or too cold (which doesn’t wake it up). Always check your yeast’s expiration date and use a thermometer to check your milk temperature.
Are these rolls healthy? These rolls provide a great source of energy and are much easier on the digestive system for those with gluten sensitivities. By making them at home, you avoid the extra preservatives often found in store-bought gluten-free breads.
Can I make these in a bread machine? Yes, you can use the “Gluten-Free” setting on your bread machine. However, the pull-apart texture is best achieved by shaping them by hand and baking them in a standard oven.


