
Have you ever wondered how a single bite can capture the cozy essence of autumn—the sweetness, the warmth, the gentle pinch of salt—and yet surprise you with something new? That’s exactly what salted pumpkin caramels can do. If you think caramel is just sugar and butter, or that pumpkin belongs only in pies and lattes, this recipe challenges that idea. Salted pumpkin caramels combine creamy caramel with real pumpkin flavor and just a touch of salt to make something you’ll want to gift, share, or savor yourself. In this post, I’ll walk you through every step—with tips, variations, and stories—so you’ll feel confident making them from scratch.
Overview: What Makes Salted Pumpkin Caramels Special?
Print
Salted Pumpkin Caramels – A Sweet-and-Savory Fall Treat
- Total Time: 1 hour 45 minutes (includes cooling)
- Yield: 36 caramels 1x
Description
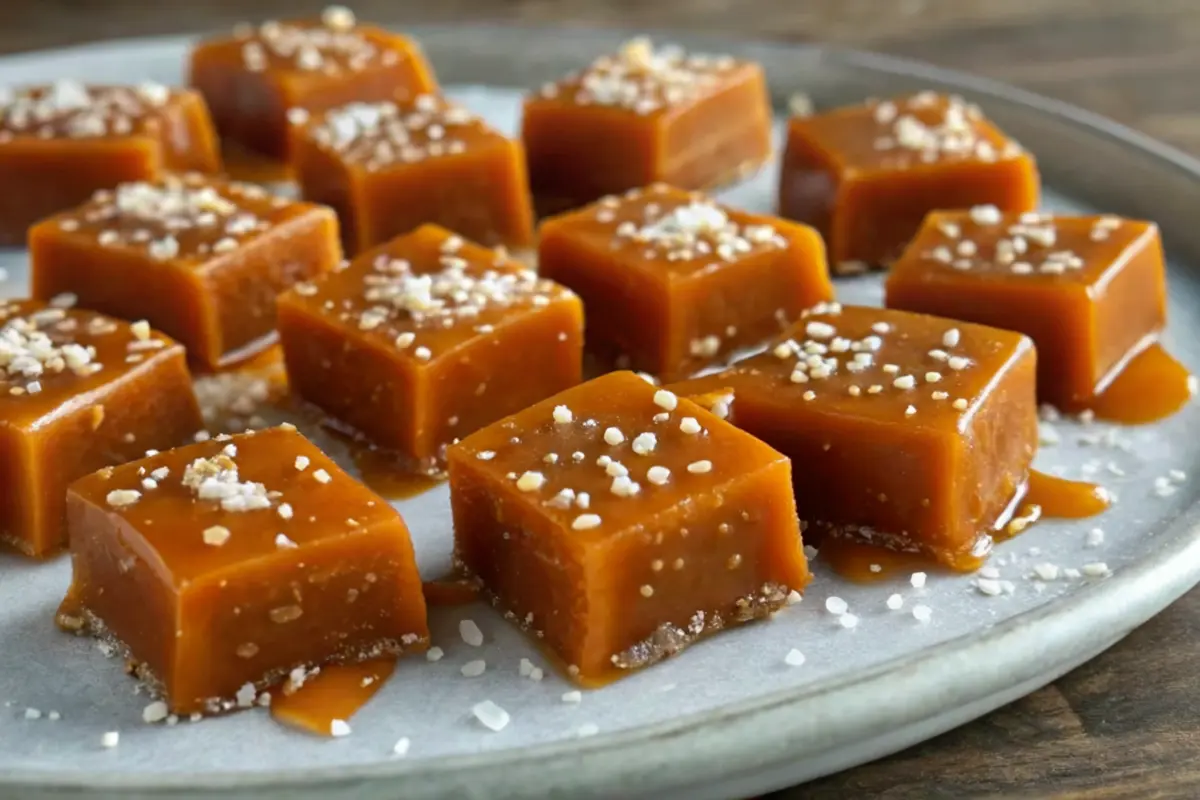
These Salted Pumpkin Caramels are a cozy fall twist on classic caramel candy—rich, buttery, and perfectly balanced with the earthy sweetness of pumpkin and a sprinkle of sea salt. Each bite melts in your mouth, bringing warmth and nostalgia to the season. Great for gifting or indulging yourself!
Ingredients
- 1 cup granulated sugar
- 1/2 cup packed light brown sugar
- 1/4 cup light corn syrup (or agave syrup)
- 3/4 cup heavy cream
- 1/4 cup pumpkin purée (not pumpkin pie filling)
- 4 tablespoons unsalted butter, cut into pieces
- 1/2 teaspoon fine salt, plus flaky sea salt for topping
- 1/2 teaspoon vanilla extract
Instructions
- Prepare the Pan: Line an 8×8-inch pan with parchment paper, leaving overhang for easy lifting. Lightly butter or grease the paper.
- Cook the Base: In a heavy saucepan, combine granulated sugar, corn syrup, and pumpkin purée. Stir over medium heat until smooth and dissolved.
- Add Butter and Brown Sugar: Mix in butter and brown sugar until melted and fully combined.
- Incorporate Cream and Salt: Slowly pour in the heavy cream while stirring; add fine salt.
- Heat to Perfection: Clip a candy thermometer to the side. Without stirring, cook the mixture until it reaches 244°F (118°C).
- Finish the Flavor: Remove from heat and stir in vanilla extract.
- Pour and Set: Pour the hot caramel into the prepared pan and sprinkle the top with flaky sea salt.
- Cool and Cut: Let set at room temperature for at least 1 hour, then cut into small squares and wrap individually.
Notes
For a pumpkin spice twist, stir in 1/4 teaspoon pumpkin pie spice before pouring. To make ahead, wrap and store at room temperature for up to two weeks. Avoid overcooking past 244°F to keep caramels chewy and not brittle.
- Prep Time: 15 minutes
- Cook Time: 30 minutes
- Category: Dessert
- Method: Stovetop
- Cuisine: American
Nutrition
- Serving Size: 1 caramel (approx.)
- Calories: 90
- Sugar: 11g
- Sodium: 65mg
- Fat: 4g
- Saturated Fat: 2.5g
- Unsaturated Fat: 1.5g
- Trans Fat: 0g
- Carbohydrates: 12g
- Fiber: 0g
- Protein: 0.3g
- Cholesterol: 12mg
Salted pumpkin caramels are a luscious crossover between candy and seasonal treat. They blend traditional caramel’s smooth, buttery sweetness with the earthy warmth of pumpkin and a hint of sea salt to balance it all. What makes them special:
- Unique flavor fusion: The pumpkin adds depth and a mild earthiness, while the salt brings contrast.
- Perfect for gifting or dessert plates: Wrapped in parchment or served on a platter, they’re beautiful and shareable.
- Clock-friendly: The active cooking time is about 20–30 minutes; with cooling and cutting, total time is around 2 hours.
- Difficulty level: Moderate. You’ll need a candy thermometer or good temperature sense, but it’s totally doable for someone comfortable in a kitchen.
In short: this is not a “throw-it-in-and-forget-it” recipe, but with care and attention, you’ll end up with a stunning, seasonal candy. Let’s walk through the ingredients and steps so you feel totally ready.
Essential Ingredients
Here’s what you’ll need to make salted pumpkin caramels. After the list, I’ll mention possible substitutions and variations.
- Granulated sugar – 1 cup
- Light corn syrup – ¼ cup (helps prevent crystalization)
- Heavy cream – ¾ cup
- Pumpkin purée (not pumpkin pie filling; pure pumpkin) – ¼ cup
- Unsalted butter – 4 tablespoons (½ stick), cut into pieces
- Light brown sugar – ½ cup, packed
- Salt – ½ teaspoon fine salt in the mix, plus flaky sea salt or coarse salt for sprinkling
- Vanilla extract – ½ teaspoon
Substitutions & Variations
- Corn syrup: You can use light agave syrup or glucose syrup, but be cautious—it may affect texture or crystallization.
- Heavy cream: You could try half-and-half or whole milk, but the caramel may be softer and less shelf-stable.
- Butter: If you must, salted butter can substitute, but adjust or skip the added salt in the mixture.
- Pumpkin purée: You may swap in sweet potato purée or butternut squash purée for a twist.
- Brown sugar: Dark brown sugar gives a richer, deeper flavor.
- Salt: Use coarse or flaky sea salt on top for contrast, but avoid over-salting.
- Spices (optional): For a seasonal twist, you could stir in ⅛–¼ teaspoon of cinnamon, nutmeg, or pumpkin pie spice. That veers into “pumpkin spice caramel,” but can be delightful.
Step-by-Step Instructions
Here’s how to make salted pumpkin caramels. Read all the steps before starting so you’re prepared.
- Prepare your pan and tools
- Line an 8×8-inch baking pan (or equivalent) with parchment paper, letting a bit hang over the edges for easy removal.
- Butter or grease the parchment lightly so caramels don’t stick.
- Place a candy thermometer or instant-read thermometer (that can measure up to 240 °C / 450 °F) nearby.
- Have a heatproof spatula ready.
- Combine sugar, corn syrup, and pumpkin purée
- In a heavy-bottomed saucepan (2- or 3-quart), stir together granulated sugar, corn syrup, and pumpkin purée.
- Cook over medium heat, stirring until the sugar dissolves and the mixture is smooth. At first it will look thick and matte, but keep stirring.
- Add butter and brown sugar
- Once sugar is dissolved, stir in the butter pieces and the light brown sugar.
- Continue stirring until the butter is melted and the sugar mixture is fully integrated. The mixture will bubble vigorously.
- Stir in cream and salt
- Slowly pour in the heavy cream while stirring. Be careful—it may sputter.
- Add the ½ teaspoon fine salt at this point.
- Bring to correct temperature
- Stop stirring and let the mixture come to a boil.
- Attach the candy thermometer.
- Let it cook, without stirring, until the temperature reaches 244 °F (118 °C) (firm final temperature). If your thermometer has Celsius, aim for about 118 °C.
- You may need to lower heat or swirl the pan gently if it’s cooking too fast or browning too much on edges.
- Finishing touches
- Once the candy reaches 244 °F, promptly remove from heat.
- Stir in the vanilla extract.
- If you like, give a gentle swirl to incorporate everything smoothly.
Assembly & Cutting
Once your caramel base is ready, follow these steps to finish the recipe:
- Pour into prepared pan
- Immediately pour the hot caramel into your prepared lined pan, using a spatula to scrape every bit from the pot.
- Tilt the pan gently so the caramel spreads evenly to the corners.
- Salt sprinkle
- While the caramel is still warm and tacky (but not hot-liquid), sprinkle the top lightly with flaky sea salt or coarse salt. Focus on a fine, even dusting—too much salt overwhelms.
- Let it set
- Allow the pan to sit at room temperature until the caramel is fully set and firm (at least 1 to 1½ hours).
- Then transfer to the refrigerator for 30 minutes to firm further (optional) if you prefer crisp edges.
- Cutting
- Lift the block out using the parchment overhang.
- Place on a cutting board and use a sharp knife (you can warm the blade in hot water and dry it) to cut into squares or rectangles—roughly 1″ × 1½″ pieces or your preferred size.
- If desired, wipe off extra salt crystals or stray bits.
- Wrapping (optional)
- You can wrap individual pieces in parchment or wax paper for neat presentation and easier storage. Twist the ends to seal.
- Presentation tips
- Arrange caramels on a pretty plate or in a festive box.
- Add a garnish like a tiny pumpkin seed or a dusting of pumpkin spice (if you’ve used the spice variation).
- These look lovely beside coffee cups, tea pots, or dessert trays at gatherings.
Storage & Make-Ahead Tips
To keep your salted pumpkin caramels fresh and soft:
- Room temperature: Place caramels in an airtight container, separated by parchment paper layers to prevent sticking. Store at cool room temperature (around 65–70 °F / 18–21 °C). They stay fresh for 2 to 3 weeks.
- Refrigerator: You can refrigerate to extend life (up to 4–6 weeks), but the coolness may harden them—just let them come back to room temperature before serving.
- Freeze: Wrap each caramel tightly or seal in freezer bags, then freeze up to 3 months. Thaw in the fridge or at room temperature before eating.
- Reheating (softening): If caramels get too firm, gently warm them for a few seconds in the microwave (5–10 s) or set the container in a warm (not hot) water bath to soften.
- Make-ahead: You can make the caramels fully, cut them, and wrap them a day ahead—store them in a cool place until serving.
Recipe Variations & Creative Twists
Here are ideas to mix things up:
- Pumpkin spice caramel: Add ⅛ to ¼ teaspoon of pumpkin pie spice or a combination of cinnamon, nutmeg, and clove.
- Salted maple pumpkin caramel: Replace part of the corn syrup with maple syrup or swirl a teaspoon of maple syrup into the batch.
- Chocolate-dipped: Dip ends or halves of caramel pieces into melted dark or milk chocolate. Let chocolate set on parchment.
- Nutty swirl: Press chopped pecans, walnuts, or toasted pumpkin seeds onto the warm caramel top before it fully sets.
- Citrus twist: Add a pinch of finely grated orange zest to the mixture for a subtle brightness.
- Vegan version: Substitute plant-based butter and use coconut cream in place of heavy cream. (Texture may differ slightly.)
- Smoky-salt version: Use smoked sea salt instead of plain flaky salt for a subtle smoky note.
Conclusion
Salted pumpkin caramels are a delightful celebration of fall in candy form. They bring together creamy caramel, gentle pumpkin flavor, and that irresistible contrast of salt. With about 20–30 minutes of cooking time and a little patience while setting, you’ll end up with a batch of beautifully rich confections perfect for enjoying yourself or giving as gifts. Don’t be afraid to try one of the variations or put your own twist on the recipe. Pull out your thermometer, line that pan, and get ready to surprise your friends—or simply treat yourself. I hope you love making and tasting these caramels as much as I do.
FAQs
1. Can I make salted pumpkin caramels without a candy thermometer?
You can, but it’s riskier. You’d have to gauge by texture—one way is to test a drop of the hot caramel in cold water: if it forms a firm ball, it’s ready. But that test is less precise, so a thermometer is strongly recommended.
2. Are there any health benefits to pumpkin in the caramels?
Pumpkin brings fiber, vitamin A, and some antioxidants, so it adds a tiny boost compared to plain caramel. But since these are candy, the sugars and fats dominate—so view any health benefit as a small bonus, not justification for overindulgence.
3. My caramel turned grainy—why, and how can I fix it?
Graininess happens when sugar crystals form. To avoid that: use corn syrup (or equivalent), don’t stir once it’s boiling, and clean down the sides of the pot with a wet pastry brush if crystals cling. If already grainy, you may be able to gently reheat and strain, though results vary.
4. Can I cut caramels into shapes (like pumpkins or stars)?
Yes—once the caramel is at least partly set, you can use small cookie cutters to press shapes. It’s easier if the caramel isn’t too brittle yet and you oil the cutter lightly. For intricate shapes, refrigerating briefly helps firm the surface.
5. Will these caramels stay sticky or too soft in warm weather?
High heat can soften them. In warm months or climates, store in the refrigerator or a cool place. Use slightly firmer cuts (thickness helps) and packaging that protects from humidity. If caramels sag a bit, a quick chill before serving refreshes their texture.


