Have You Ever Wondered Why Girl Scout Cookie Season Is So Short?
It is a question that haunts every fan of that famous purple box. We wait all year for that knock on the door, only to have our favorite treats disappear from the pantry just a few weeks later. The craving for Samoa Cookies—that perfect mix of chewy coconut, sweet caramel, and rich chocolate—does not follow a calendar. What if you could have that exact flavor whenever you wanted without ever turning on your oven? This recipe changes everything. You do not have to wait for cookie season anymore. You can make your own batch of fresh, delicious cookies right in your kitchen in less time than it takes to drive to the store.
Why This Recipe Is a Game Changer
Print
Quick & Easy No-Bake Girl Scout Samoa Cookies
- Total Time: 20 minutes
- Yield: 24 cookies 1x
Description
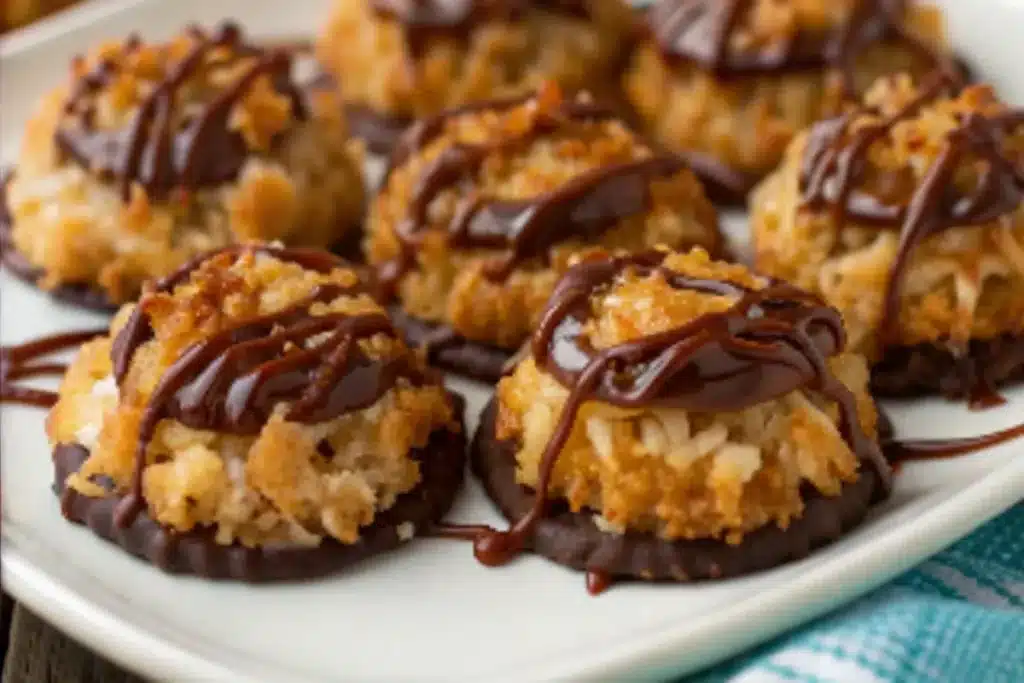
These No-Bake Samoa Cookies are a dream come true for Girl Scout cookie fans. This recipe recreates the iconic blend of toasted coconut, chewy caramel, and rich chocolate on a crunchy shortbread base without ever turning on the oven. They are fast, simple, and perfect for satisfying that craving any time of year.
Ingredients
- 2 cups shredded sweetened coconut
- 11 oz bag caramels, unwrapped
- 1 tablespoon milk or heavy cream
- 1 package (approx. 24) shortbread cookies or vanilla wafers
- 8 oz semi-sweet or dark chocolate chips
- Optional: pinch of sea salt for garnish
Instructions
- Toast the Coconut: Place shredded coconut in a large skillet over medium-low heat. Stir constantly for 3-5 minutes until golden brown and fragrant. Move to a bowl immediately to stop cooking.
- Melt the Caramel: Combine caramels and milk in a microwave-safe bowl. Microwave in 30-second intervals, stirring in between, until completely smooth.
- Combine: Fold the toasted coconut into the melted caramel until every shred is well coated.
- Assemble the Base: Place shortbread cookies on a sheet of parchment paper. Spoon the warm coconut-caramel mixture onto the top of each cookie, pressing down slightly to stick.
- Chocolate Coating: Melt the chocolate chips in the microwave. Dip the bottom of each assembled cookie into the chocolate and place back on the parchment.
- The Drizzle: Use a spoon or piping bag to drizzle the remaining chocolate over the tops of the cookies. Let set until firm.
Notes
Watch the coconut closely as it can burn in seconds once it starts to brown. If the caramel gets too stiff while assembling, pop it back in the microwave for 10 seconds. For the best texture, let the cookies set in the refrigerator for 15 minutes before serving.
- Prep Time: 20 minutes
- Cook Time: 0 minutes
- Category: Dessert
- Method: No-Bake
- Cuisine: American
Nutrition
- Serving Size: 1 cookie
- Calories: 150
- Sugar: 14g
- Sodium: 65mg
- Fat: 8g
- Saturated Fat: 5g
- Unsaturated Fat: 3g
- Trans Fat: 0g
- Carbohydrates: 19g
- Fiber: 1g
- Protein: 1g
- Cholesterol: 5mg
This recipe for no-bake Samoa Cookies is special because it focuses on simplicity and speed. Traditional cookie recipes require chilling dough, rolling it out, using cookie cutters, and carefully watching an oven so the edges do not burn. This version skips all of that stress.
- Time Requirement: You only need about 20 minutes of active work time.
- Difficulty Level: Very Easy. If you can stir a spoon and melt chocolate, you can make these.
- Kid-Friendly: Since there is no hot oven involved for the baking process, this is a perfect activity for little helpers.
These cookies capture the “soul” of the original Samoa. You get the crunch of the toasted coconut and the pull of the caramel, all sitting on a decadent chocolate base. It is a gourmet-tasting treat that anyone can master on their first try.
Essential Ingredients
To make the best Samoa Cookies, you only need a few high-quality ingredients. Most of these might already be in your pantry.
- Shredded Coconut: Use sweetened shredded coconut for that classic taste. If you want to control the sugar, you can use unsweetened.
- Caramels: You can use the classic square wrapped caramels or caramel bits.
- Milk or Heavy Cream: A small splash helps thin the caramel so it stays soft and chewy rather than getting rock hard.
- Chocolate Chips: Semi-sweet or dark chocolate works best to balance the sweetness of the caramel.
- Shortbread Cookies or Crackers: Since this is a no-bake version, we use pre-made vanilla wafers or shortbread cookies as the base.
Easy Substitutions
- Vegan Option: Use dairy-free chocolate chips and a coconut-based caramel sauce.
- Gluten-Free Option: Simply use your favorite gluten-free shortbread or vanilla cookies as the base.
- Nutty Twist: Stir in a tablespoon of almond butter to the caramel for a deeper, nuttier flavor profile.
Step-by-Step Instructions
Making these cookies is all about the preparation. Follow these steps to ensure your Samoa Cookies turn out perfectly every time.
Step 1: Toast the Coconut
Toasting the coconut is the most important step. It provides the golden color and the nutty flavor that defines a Samoa.
- Place your shredded coconut in a large skillet over medium-low heat.
- Stir constantly. Coconut can burn very quickly, so do not walk away.
- Once the coconut is a beautiful golden brown and smells fragrant, move it to a large bowl immediately so it stops cooking.
Step 2: Melt the Caramel
- In a microwave-safe bowl, combine your unwrapped caramels and a tablespoon of milk or cream.
- Microwave in 30-second intervals, stirring in between, until the mixture is completely smooth.
- If you prefer the stove, use a small saucepan over low heat, stirring constantly until melted.
Step 3: Combine
- Pour the melted caramel over your toasted coconut.
- Fold the mixture together until every shred of coconut is coated in sticky, delicious caramel.
Assembly and Presentation
Now comes the fun part: building the cookies. This is where your Samoa Cookies really start to look like the real deal.
- Prepare the Base: Lay out your shortbread cookies on a piece of parchment paper. This prevents sticking and makes cleanup a breeze.
- Apply the Topping: Take a spoonful of the warm coconut-caramel mixture and press it onto the top of each cookie. Use your fingers or the back of a spoon to create a little mound. If you want the traditional “donut” look, use the end of a wooden spoon to poke a hole in the center.
- The Chocolate Bottom: Melt your chocolate chips in the microwave. Dip the bottom of each coconut-topped cookie into the melted chocolate. Place it back on the parchment paper.
- The Signature Drizzle: Dip a fork or a spoon into the remaining melted chocolate and drizzle thin lines back and forth across the top of the cookies.
Presentation Tips
For a professional look, sprinkle a tiny pinch of sea salt over the chocolate while it is still wet. This makes the caramel flavor pop. You can also serve these on a bright blue platter to mimic the classic Girl Scout box colors.
Storage and Make-Ahead Tips
One of the best things about Samoa Cookies is that they actually taste better the next day once the flavors have had time to settle.
- Room Temperature: Store cookies in an airtight container for up to 3 days. Keep them in a cool spot so the chocolate does not melt.
- Refrigeration: These cookies are excellent when chilled. Store them in the fridge for up to a week. This gives them a nice, firm snap.
- Freezing: You can freeze these for up to 3 months. Lay them flat on a tray to freeze first, then move them into a freezer bag. This prevents them from sticking together.
Creative Recipe Variations
Once you master the basic Samoa Cookies, you can get creative with different versions.
- The Samoa Bark: Instead of individual cookies, spread the chocolate on a tray, layer the coconut-caramel on top, and break it into pieces once cooled.
- Dark Chocolate Sea Salt: Use 70% dark chocolate and extra flaky salt for a more “grown-up” dessert.
- White Chocolate Samoa: Swap the dark chocolate for white chocolate for a very sweet, creamy treat.
- Pretzel Samoas: Use a salty pretzel thin as the base instead of a cookie for a perfect sweet-and-salty combination.
Health Benefits and Nutrition
While these are definitely a treat, there are some benefits to making them at home. When you make your own Samoa Cookies, you avoid the preservatives and high-fructose corn syrup often found in store-bought boxes. Coconut is a good source of healthy fats and fiber. By choosing dark chocolate, you also get a boost of antioxidants. You can even lower the sugar content by using sugar-free caramels or stevia-sweetened chocolate chips.
Conclusion
Creating your own Samoa Cookies at home is a rewarding experience that saves money and satisfies your sweet tooth instantly. You do not need to be a professional baker or have an expensive kitchen to make something that tastes this good. Whether you are making them for a school party, a gift, or just a Tuesday night snack, these cookies are sure to bring a smile to everyone’s face. Go ahead and try a batch today. Experiment with different chocolates or bases, and find your own perfect version of this classic treat.
Frequently Asked Questions
Why is my caramel too hard to chew?
This usually happens if the caramel was overheated or if no liquid was added. Make sure to add that splash of milk or cream. If they are already hard, let them sit at room temperature for an hour before eating to soften up.
Can I use coconut oil instead of milk in the caramel?
Yes. A teaspoon of coconut oil will help the caramel stay smooth and add a nice shine to the chocolate.
My toasted coconut is bitter. What happened?
If coconut gets too dark, it becomes bitter. You want a light golden brown color. If it turns dark brown, it is best to start over with a fresh batch.
Are these cookies gluten-free?
They can be. The coconut and caramel are naturally gluten-free. Just ensure you use a gluten-free certified shortbread cookie or cracker for the base.
How do I get the chocolate drizzle to look neat?
The secret is a piping bag. If you do not have one, put the melted chocolate in a small sandwich bag and snip off a tiny corner. This gives you much more control than using a spoon.
Is it okay to use desiccated coconut instead of shredded?
Desiccated coconut is much finer and drier. It will still taste good, but you will lose that iconic “shaggy” look and chewy texture of a real Samoa. Shredded coconut is highly recommended for this specific recipe.