
Do you ever crave something sweet, creamy, and tangy—all in one bite?
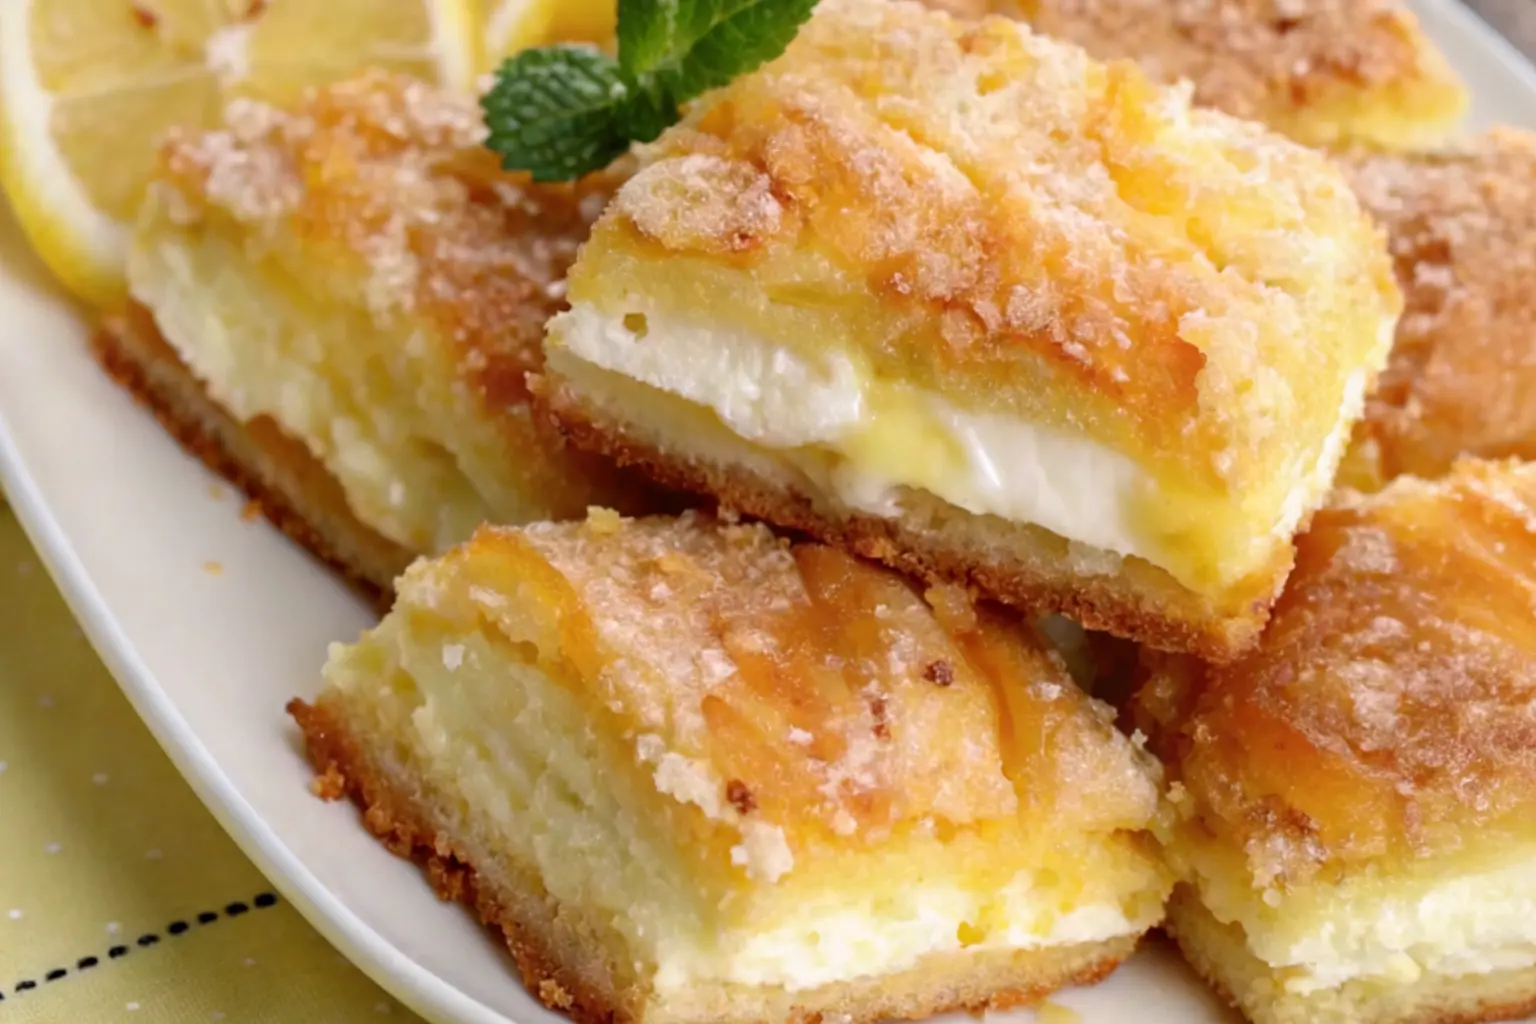
Lemon desserts are known for their bright, refreshing flavor. But when you combine zesty lemon with smooth, rich cream cheese, you create something magical: Lemon Cream Cheese Bars. These bars strike a perfect balance between sweet and tangy, soft and firm, creamy and crumbly. Whether you’re baking for a summer picnic, potluck, or just a cozy afternoon treat, this recipe is sure to hit the spot.
Why You’ll Love These Lemon Cream Cheese Bars
Print
Lemon Cream Cheese Bars
- Total Time: 55 minutes
- Yield: 12 bars 1x
- Diet: Vegetarian
Description
These Lemon Cream Cheese Bars are the perfect mix of sweet, tangy, and creamy with a buttery crust. They’re simple to make, refreshing, and great for parties, potlucks, or an easy dessert any day of the week.
Ingredients
- 1 cup unsalted butter, softened
- 2 cups all-purpose flour
- ½ cup powdered sugar
- 8 oz cream cheese, softened
- ½ cup granulated sugar
- 1 large egg
- 1 tsp vanilla extract
- 2 large eggs
- 1 cup granulated sugar
- 2 tbsp all-purpose flour
- ⅓ cup fresh lemon juice
- 1 tbsp lemon zest
- Powdered sugar, for dusting (optional)
Instructions
- Prepare the Crust: Preheat oven to 350°F (175°C). Mix butter, flour, and powdered sugar until crumbly. Press into a greased or lined 9×13 inch baking pan. Bake for 15–18 minutes until golden. Let cool slightly.
- Make Cream Cheese Layer: In a bowl, beat cream cheese until smooth. Add ½ cup sugar, 1 egg, and vanilla. Blend well. Spread over the baked crust evenly.
- Make Lemon Layer: In a separate bowl, whisk 2 eggs, 1 cup sugar, 2 tbsp flour, lemon juice, and lemon zest until fully combined. Gently pour over the cream cheese layer.
- Bake: Bake for 20–25 minutes, or until the lemon layer is set. Cool at room temperature, then chill in the fridge for at least 1 hour.
- Serve: Dust with powdered sugar if desired. Slice into bars and serve chilled.
Notes
For best results, use fresh lemon juice and zest. To get clean cuts, use a sharp knife and wipe it between slices. Store leftovers in the refrigerator for up to 5 days or freeze for up to 2 months.
- Prep Time: 15 minutes
- Cook Time: 40 minutes
- Category: Dessert
- Method: Baking
- Cuisine: American
Nutrition
- Serving Size: 1 bar
- Calories: 290
- Sugar: 21g
- Sodium: 120mg
- Fat: 16g
- Saturated Fat: 9g
- Unsaturated Fat: 6g
- Trans Fat: 0g
- Carbohydrates: 34g
- Fiber: 0g
- Protein: 3g
- Cholesterol: 60mg
These bars aren’t your average lemon treat. They’re made with a buttery, slightly crispy crust, a velvety cream cheese layer, and a lemon topping that melts in your mouth. Here’s why they stand out:
- Quick to make: Ready in under an hour.
- Easy ingredients: Everything is simple and likely already in your kitchen.
- Beginner-friendly: No special tools or fancy techniques required.
- Great for any occasion: Light enough for a summer dessert, rich enough for the holidays.
Time Required:
- Prep Time: 15 minutes
- Bake Time: 35–40 minutes
- Cool Time: 1 hour before slicing
Difficulty Level: Easy to Moderate
Essential Ingredients
Crust Layer:
- 1 cup unsalted butter (softened)
- 2 cups all-purpose flour
- ½ cup powdered sugar
Cream Cheese Filling:
- 8 oz cream cheese (softened)
- ½ cup granulated sugar
- 1 large egg
- 1 teaspoon vanilla extract
Lemon Layer:
- 2 large eggs
- 1 cup granulated sugar
- 2 tablespoons all-purpose flour
- ⅓ cup freshly squeezed lemon juice
- 1 tablespoon lemon zest
Topping (Optional):
- Powdered sugar for dusting
Ingredient Substitutions & Variations
- Butter: Can be replaced with margarine or plant-based butter.
- Flour: Try almond flour for a nutty crust (texture may vary).
- Sugar: Coconut sugar works but may darken the color.
- Lemon Juice: Bottled juice can work in a pinch, but fresh is best for flavor.
- Lemon Zest: Optional, but it boosts the citrus flavor.
Step-by-Step Instructions
1. Prepare the Crust
- Preheat your oven to 350°F (175°C).
- In a medium bowl, mix softened butter, flour, and powdered sugar until it forms a crumbly dough.
- Press the mixture firmly into the bottom of a greased or parchment-lined 9×13-inch baking dish.
- Bake for 15–18 minutes, or until the edges are lightly golden.
- Remove from oven and set aside to cool slightly.
2. Make the Cream Cheese Filling
- In another bowl, beat softened cream cheese until smooth.
- Add sugar, egg, and vanilla extract, and beat until fully blended.
- Pour over the warm crust and gently spread it into an even layer.
3. Prepare the Lemon Layer
- In a clean bowl, whisk eggs, sugar, flour, lemon juice, and zest until smooth.
- Gently pour the lemon mixture over the cream cheese layer.
- Tilt the pan slightly to ensure the lemon layer spreads evenly without disturbing the cream cheese underneath.
4. Bake the Layers Together
- Return the pan to the oven and bake for 20–25 minutes, or until the top looks set and no longer jiggles in the center.
- Let cool at room temperature for about 30 minutes, then chill in the fridge for at least 1 hour.
Assembly and Presentation Tips
- For clean slices, use a sharp knife and wipe it clean between cuts.
- Dust the top with powdered sugar right before serving for a classic look.
- Serve chilled for the best flavor and texture.
Optional presentation idea: Garnish each bar with a small twist of lemon zest or a thin lemon slice.
Storage and Make-Ahead Tips
Refrigeration:
- Store in an airtight container in the refrigerator for up to 5 days.
Freezing:
- Freeze in a single layer wrapped in parchment and sealed in a zip-top bag for up to 2 months.
- Thaw in the fridge overnight before serving.
Make-Ahead:
- You can prepare the crust and cream cheese layers a day ahead. Just add the lemon layer and bake the next day.
Recipe Variations
- Berry Lemon Bars: Add a handful of fresh blueberries or raspberries to the lemon layer before baking.
- Gluten-Free Version: Use a gluten-free flour blend for both the crust and lemon layer.
- Low Sugar: Reduce sugar slightly or use a sugar substitute like monk fruit sweetener.
- Coconut Twist: Add shredded coconut to the crust for a tropical flair.
- Lemon-Lime Bars: Use half lemon juice and half lime juice for a fun citrus twist.
Conclusion
Lemon Cream Cheese Bars are a little slice of happiness. The creamy center, zesty top, and buttery crust make every bite satisfying. Whether you’re an experienced baker or just getting started, this recipe is simple enough to try and delicious enough to impress.
So go ahead—get creative! Add your own twist, share them with friends, or keep them all to yourself. Once you try them, you’ll understand why these bars are a favorite in so many kitchens.
Frequently Asked Questions
1. Can I use bottled lemon juice instead of fresh?
Yes, but fresh lemon juice gives the bars a brighter, more vibrant flavor.
2. Do I need to use lemon zest?
Zest enhances the lemon flavor, but you can leave it out if you don’t have any.
3. Can I make these bars without cream cheese?
You could leave it out, but they’ll lose that rich, creamy texture. Instead, you could try using mascarpone or Greek yogurt for a different result.
4. Are Lemon Cream Cheese Bars healthy?
While they are a treat, they do offer some benefits—like vitamin C from the lemon juice. You can make them healthier by reducing the sugar or using whole wheat flour.
5. Can I double the recipe?
Yes, just use a larger baking dish or make two batches. Adjust the baking time as needed.
6. How do I keep the layers from mixing together?
Make sure the cream cheese layer is fully spread and gently pour the lemon layer on top to avoid mixing.


