
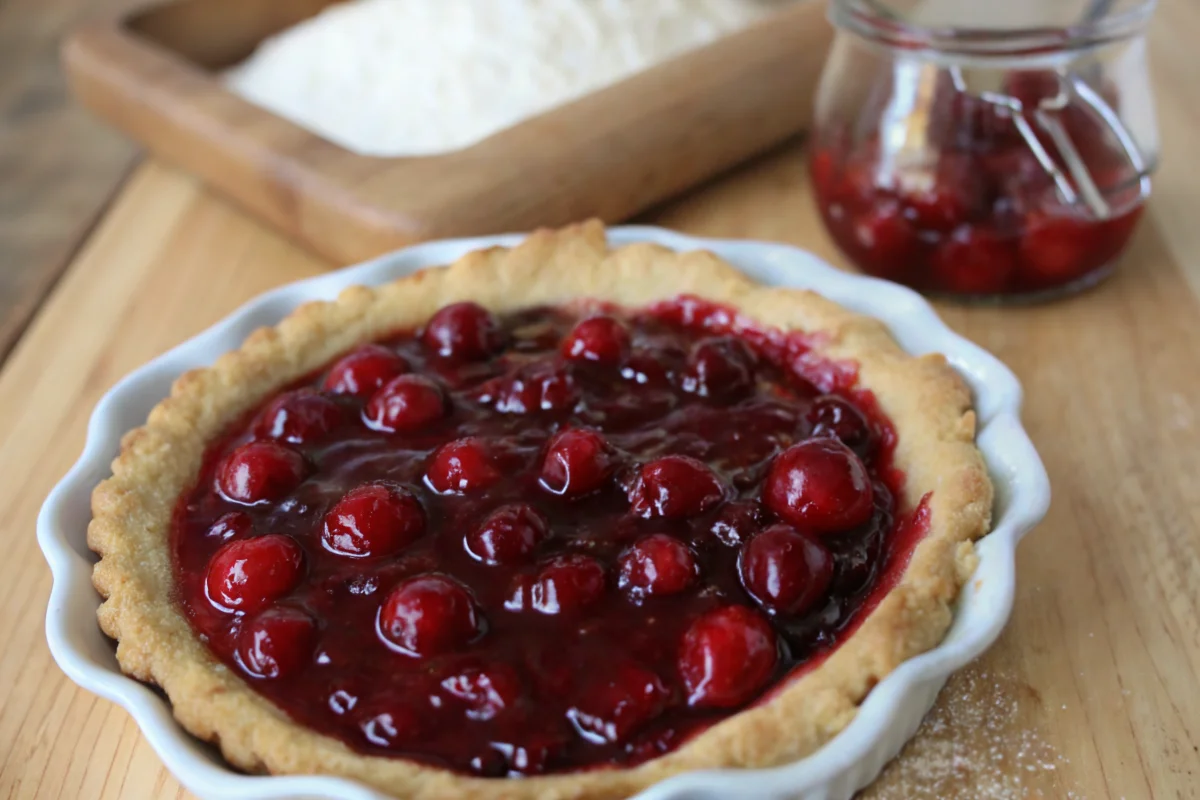
Do cherries always need to come from a can?
If you’ve ever thought that cherry pie filling only comes from a can with a suspiciously glossy red gel, you’re not alone. But here’s the truth: homemade cherry pie filling is not only easy to make—it’s also tastier, fresher, and far healthier than the store-bought stuff. In just a few steps, you can have a glossy, sweet-tart filling that makes your cherry pie truly unforgettable.
What Makes This Recipe Special?
This homemade cherry pie filling is:
- Quick to prepare: Only about 20 minutes from start to finish.
- Beginner-friendly: You don’t need fancy tools or baking experience.
- Flexible: You can use fresh, frozen, or canned cherries.
- Healthier: You get to control the sugar and skip the preservatives.
Whether you’re baking a full cherry pie, making hand pies, or just need a topping for your cheesecake or ice cream, this filling fits right in.
Essential Ingredients (and Why They Matter)
You only need a handful of ingredients to make your cherry pie dreams come true:
- Cherries (4 cups, pitted):
The star of the show. Sweet cherries like Bing or sour cherries like Montmorency both work.
Substitution: Frozen cherries are great when fresh aren’t available. Just thaw and drain them first. - Sugar (¾ cup):
Balances the tartness and brings out the natural cherry flavor.
Tip: Adjust to taste, especially if using sweet cherries. - Cornstarch (¼ cup):
Thickens the filling so it holds its shape inside the pie.
Substitute: Arrowroot powder or flour, though flour makes it a bit cloudier. - Water (1 cup):
Helps cook the cherries down into a sauce. - Lemon juice (1 tablespoon):
Adds brightness and preserves the color.
Tip: A touch of apple cider vinegar also works in a pinch. - Vanilla extract (1 teaspoon):
Adds a cozy depth of flavor. Optional, but lovely. - Salt (pinch):
Balances sweetness and sharpens all the flavors.
Step-by-Step Instructions
Let’s walk through how to make this easy cherry pie filling from scratch.
Step 1: Prep the cherries
If using fresh cherries, pit them first. This step takes a little time but is worth it. If using frozen cherries, thaw them completely and drain any extra liquid.
Step 2: Make the slurry
In a small bowl, stir the cornstarch into half the water (½ cup) to make a smooth slurry. This prevents lumps later on.
Step 3: Cook the cherries
In a medium saucepan, add the cherries, remaining ½ cup of water, sugar, lemon juice, and salt. Bring it to a gentle simmer over medium heat.
Step 4: Thicken the filling
Once the cherries are soft and releasing juices (about 5 minutes), stir in the cornstarch slurry. Continue to cook, stirring constantly, until the mixture thickens. It should look glossy and coat the back of a spoon.
Step 5: Add flavor
Remove from heat. Stir in the vanilla extract and let the filling cool slightly.
Assembly Tips
Once your filling is ready, here’s how to use it in your cherry pie:
- Use cooled filling: Always let the filling cool to room temperature before adding it to your pie crust. Warm filling can melt the crust.
- Even distribution: Spread the filling evenly into the crust to avoid soggy spots.
- Top crust choices: You can go with a classic double crust, a lattice crust, or even streusel topping for a crumble effect.
- Presentation: Brush your top crust with egg wash and sprinkle a little sugar for a golden finish that sparkles.
Storage and Make-Ahead Tips
Your cherry pie filling stores beautifully:
- Refrigerator: Store in an airtight jar or container for up to 5 days.
- Freezer: Cool completely, then freeze for up to 3 months. Thaw in the fridge overnight before using.
- Make-ahead tip: Make a double batch and freeze half for later. You’ll thank yourself when cherry season is long gone.
Recipe Variations
Want to play around with this classic? Here are some fun twists:
- Spiced Cherry Filling: Add a pinch of cinnamon or nutmeg for a warm, cozy flavor.
- Boozy Cherry Filling: Stir in 1 tablespoon of brandy or Amaretto at the end for an adult treat.
- Berry-Cherry Blend: Mix in raspberries or blueberries for a mixed fruit filling.
- Sugar-Free Version: Use a sugar substitute like erythritol or stevia for a diabetic-friendly version.
FAQs
Can I use frozen cherries for this recipe?
Yes! Just thaw and drain them before using. They work just as well as fresh ones.
How do I keep the pie filling from being too runny?
Make sure your cornstarch is fully dissolved in water before adding it. Cook the filling until it’s thick and glossy before using it.
Is cherry pie filling healthy?
Homemade versions are far healthier than canned ones. You skip the corn syrup, dyes, and preservatives, and you can adjust the sugar level to suit your diet.
How much filling does this make?
This recipe makes about 3 cups of filling—enough for one standard 9-inch pie.
Can I use this filling for more than pie?
Absolutely! Use it for cherry turnovers, spoon it over pancakes, swirl it into yogurt, or layer it into a trifle.
Conclusion
Cherry pie doesn’t have to start with a can. With just a few pantry staples, you can whip up your own homemade cherry pie filling that bursts with real fruit flavor and that perfect balance of sweet and tart. The best part? It’s ready in minutes and stores well—so you can have a taste of summer anytime.
Don’t be afraid to get creative—try it with different fruits, a touch of spice, or even a splash of something boozy. Once you make it from scratch, you may never reach for the canned version again.
Print
How to Make Homemade Cherry Pie Filling (Easy & Delicious!)
- Total Time: 20 minutes
- Yield: About 3 cups 1x
Description
This easy homemade cherry pie filling is bursting with fresh cherry flavor and just the right amount of sweetness. Perfect for pies, pastries, and spooned over desserts, it comes together in under 30 minutes using simple pantry ingredients.
Ingredients
-
¾ cup granulated sugar
-
¼ cup cornstarch
-
1 cup water (divided into two ½-cup portions)
-
1 tablespoon lemon juice (fresh or bottled)
-
1 teaspoon vanilla extract (optional)
-
Pinch of salt
4 cups pitted cherries (fresh or frozen, thawed and drained if frozen)
Instructions
Step 1: If using fresh cherries, wash and pit them. If using frozen, thaw and drain excess liquid.
Step 2: In a small bowl, mix ¼ cup cornstarch with ½ cup of water until smooth. Set aside.
Step 3: In a saucepan, combine cherries, remaining ½ cup of water, sugar, lemon juice, and a pinch of salt. Bring to a simmer over medium heat, stirring occasionally.
Step 4: Once the cherries soften (after about 5 minutes), stir in the cornstarch mixture. Continue to stir until the filling thickens and becomes glossy—about 3–5 minutes.
Step 5: Remove from heat and stir in vanilla extract. Let cool before using in pies or storing.
Notes
-
For sour cherries, you may need a bit more sugar.
-
To make it sugar-free, use a sweetener like erythritol.
-
Store in the fridge for up to 5 days or freeze for up to 3 months.
-
Great for more than pie—try it in trifles, cheesecakes, or as an ice cream topping.
- Prep Time: 10 minutes
- Cook Time: 10 minutes
- Cuisine: American


