
Have you ever wondered why restaurant buffalo wings always seem to have that perfect crunch while homemade ones often end up soggy and sad?
It is a common frustration for home cooks everywhere. You buy the best chicken, you toss it in the right sauce, but the texture just isn’t there. Most people think you need a commercial deep fryer to get that satisfying snap when you bite into a wing. Some think the secret is a hidden ingredient that only professional chefs know. The truth is much simpler than that. You can make the best Buffalo Wings of your life right in your own kitchen using simple techniques that guarantee an extra crispy skin and a bold, saucy finish every single time.
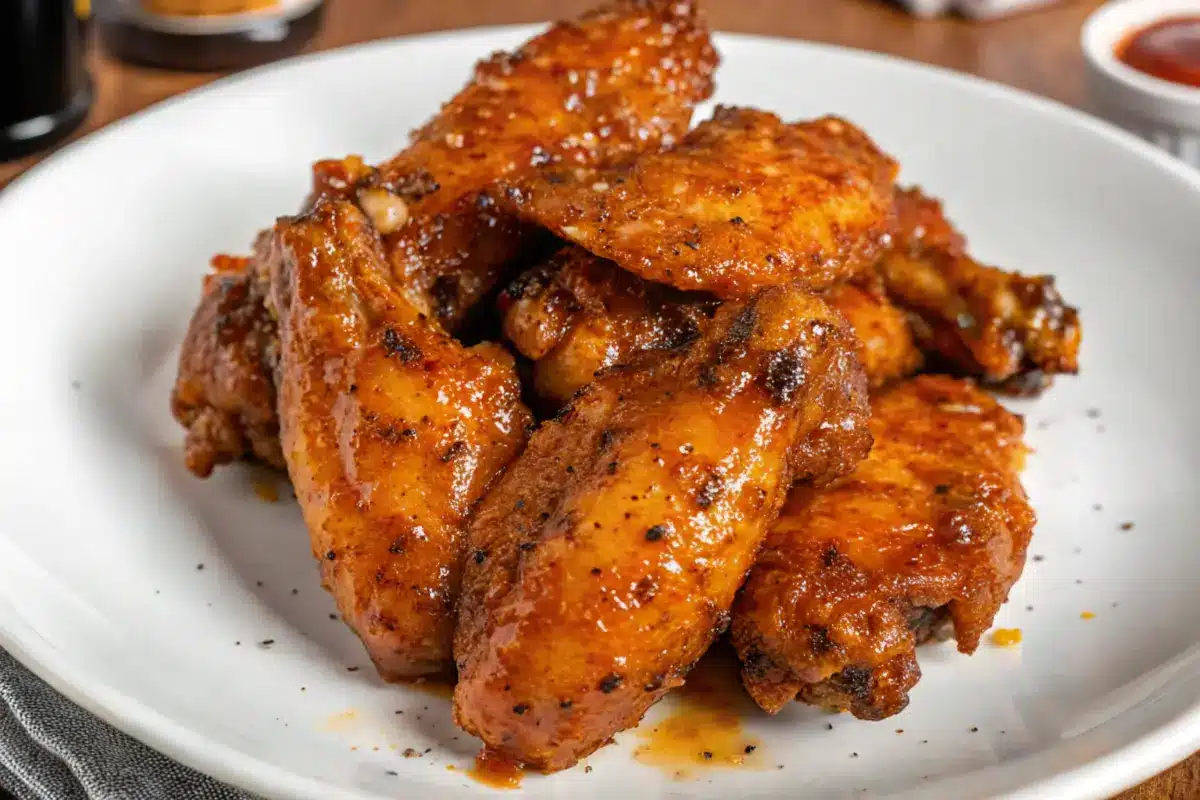
Overview of the Best Buffalo Wings
Print
Homemade Buffalo Wings Recipe: Extra Crispy & Saucy
- Total Time: 1 hour 5 minutes
- Yield: 4–6 servings 1x
Description
Have you ever wondered why restaurant buffalo wings always seem to have that perfect crunch while homemade ones often end up soggy? This recipe uses a simple science-based drying and coating method to guarantee an extra crispy skin and a bold, buttery finish every single time without a deep fryer.
Ingredients
- 4 pounds chicken wings (flats and drumettes separated)
- 2 tablespoons baking powder (aluminum-free)
- 1 teaspoon kosher salt
- 1 teaspoon cracked black pepper
- 1 teaspoon garlic powder
- 1 teaspoon smoked paprika
- 2/3 cup hot pepper sauce (like Frank’s RedHot)
- 1/2 cup unsalted butter, melted
- 1 1/2 tablespoons white vinegar
- 1/4 teaspoon Worcestershire sauce
- 1/4 teaspoon cayenne pepper (optional)
- 1/8 teaspoon garlic powder
Instructions
- Dry the Chicken: Pat every wing completely dry with paper towels. For best results, air-dry on a rack in the fridge for 1 hour.
- Coat for Crispiness: Toss wings in a large bag with baking powder, salt, pepper, garlic powder, and smoked paprika until evenly coated.
- Prepare the Pan: Preheat oven to 425°F. Place a wire cooling rack over a foil-lined baking sheet.
- Bake to Golden: Arrange wings in a single layer. Bake for 45-50 minutes until skin is bubbling and deep golden brown.
- Whisk the Sauce: While baking, combine hot sauce, melted butter, vinegar, Worcestershire, and spices in a saucepan over low heat until blended.
- Toss and Serve: Let wings rest for 2 minutes, then toss in a large bowl with the warm sauce until fully coated.
Notes
Ensure the baking powder is aluminum-free to avoid a metallic aftertaste. Don’t skip the drying step; moisture is the enemy of a good crunch. For extra brightness, serve with fresh celery and cold blue cheese or ranch dressing.
- Prep Time: 15 minutes
- Cook Time: 50 minutes
- Category: Appetizer
- Method: Oven-Baked
- Cuisine: American
Nutrition
- Serving Size: 1 serving (approx 6-8 wings)
- Calories: 480
- Sugar: 1g
- Sodium: 920mg
- Fat: 32g
- Saturated Fat: 14g
- Unsaturated Fat: 15g
- Trans Fat: 0g
- Carbohydrates: 2g
- Fiber: 0g
- Protein: 38g
- Cholesterol: 145mg
This recipe is special because it focuses on the science of the skin. We are not just tossing chicken in a pan. We are using a specific drying and coating method that mimics the results of a high-end sports bar. These Buffalo Wings are designed to be the star of your next party or a fun weekend dinner.
- Difficulty Level: Easy. If you can use a bowl and an oven or air fryer, you can make these.
- Prep Time: 15 minutes.
- Cook Time: 45 to 50 minutes.
- Total Time: About 1 hour.
The best part about this recipe is its versatility. While the classic heat is always a winner, the base method allows you to swap sauces easily. It is also surprisingly healthy when compared to the deep-fried versions because we are using high heat to render the fat out of the skin rather than adding more oil.
Essential Ingredients and Measurements
To get started, you will need a few basic items. Most of these are likely already in your pantry.
For the Wings:
- 4 pounds of chicken wings (flats and drumettes separated)
- 2 tablespoons of baking powder (Make sure it is aluminum-free to avoid a metallic taste)
- 1 teaspoon of kosher salt
- 1 teaspoon of cracked black pepper
- 1 teaspoon of garlic powder
- 1 teaspoon of smoked paprika
For the Signature Buffalo Sauce:
- 2/3 cup of hot pepper sauce (Frank’s RedHot is the traditional choice)
- 1/2 cup of unsalted butter (melted)
- 1 1/2 tablespoons of white vinegar
- 1/4 teaspoon of Worcestershire sauce
- 1/4 teaspoon of cayenne pepper (optional for extra heat)
- 1/8 teaspoon of garlic powder
Substitutions and Variations:
- The Butter: If you want to keep it dairy-free, you can use a vegan butter substitute or even refined coconut oil, though the flavor will change slightly.
- The Heat: If you do not like spicy food, you can swap the hot sauce for a mild barbecue sauce or a honey mustard glaze.
- The Spice: For a “dry rub” version, omit the sauce entirely and double the amount of smoked paprika and garlic powder.
Step-by-Step Instructions
Follow these steps carefully. The secret to the crunch is in the first two steps.
1. Dry the Chicken Remove your chicken wings from the packaging. Use paper towels to pat every single wing completely dry. Moisture is the enemy of crispiness. If the skin is wet, it will steam instead of fry. For the best results, place the dried wings on a rack in the fridge for an hour before cooking to let the skin air-dry even further.
2. The Baking Powder Coating Place your dried wings in a large gallon-sized zipper bag or a very large bowl. Add the baking powder, salt, pepper, garlic powder, and smoked paprika. Shake or toss until every wing is lightly and evenly coated. The baking powder changes the pH level of the chicken skin, which helps it break down and become thin and crispy.
3. Set Up the Pan Preheat your oven to 425 degrees Fahrenheit. Line a large baking sheet with aluminum foil for easy cleanup. Place a wire cooling rack on top of the baking sheet. Putting the wings on a rack allows hot air to circulate under the chicken, so you do not have to flip them constantly.
4. The Bake Arrange the wings on the rack in a single layer. Make sure they are not touching. Bake for 45 to 50 minutes. You will see the skin start to bubble and turn a deep golden brown.
5. The Sauce Simmer While the wings are baking, whisk the hot sauce, melted butter, vinegar, Worcestershire sauce, and spices in a small saucepan over low heat. Once it is blended and warm, take it off the heat. Do not let it boil, or the sauce might separate.
Assembly and Presentation
Once the wings are out of the oven, let them rest for just two minutes. This helps the skin set so it stays crunchy even after the sauce is added.
How to Combine: Place the hot wings into a large, clean metal bowl. Pour the warm Buffalo sauce over the wings. Use a pair of tongs or a large spoon to toss the wings gently until every nook and cranny is coated in that orange, buttery goodness.
Tips for Presentation:
- The Classic Look: Serve your Buffalo Wings on a large white platter to make the color pop.
- The Sides: Always include cold celery sticks and carrot sticks. They provide a refreshing crunch that cuts through the spice.
- The Dip: Place a small bowl of blue cheese dressing or ranch dressing in the center of the platter.
- The Garnish: A sprinkle of fresh parsley or extra cracked black pepper makes the dish look professional.
Storage and Make-Ahead Tips
Buffalo Wings are best when eaten fresh, but you can certainly handle leftovers or prep ahead.
- To Store: Put leftover wings in an airtight container. They will stay fresh in the refrigerator for up to four days.
- To Reheat: Never use the microwave for leftover wings if you want them to stay crispy. Instead, put them back in the oven at 350 degrees Fahrenheit for about 10 minutes, or use an air fryer for 3 to 5 minutes.
- Make-Ahead: You can coat the wings in the baking powder mixture up to 24 hours in advance. Keep them on a rack in the fridge. This actually makes them even crispier when you finally bake them.
Creative Recipe Variations
Once you master the base Buffalo Wings, you can try these fun twists:
- Honey Buffalo: Mix 2 tablespoons of honey into your finished sauce for a sweet and spicy flavor.
- Garlic Parmesan: Skip the buffalo sauce. Toss the crispy wings in melted butter, minced garlic, and plenty of grated parmesan cheese.
- Lemon Pepper Buffalo: Add a teaspoon of lemon zest and extra black pepper to the buffalo sauce for a bright, zesty kick.
Conclusion
Making Buffalo Wings at home does not have to be a mystery. By using the baking powder trick and ensuring your chicken is dry before it hits the heat, you can create a meal that rivals any restaurant. This recipe is quick to prep, healthier than frying, and incredibly satisfying. Do not be afraid to play with the heat levels or try new dipping sauces. Get into the kitchen, try this method, and enjoy the crunch.
FAQs
Are Buffalo Wings healthy? When baked or air-fried like in this recipe, Buffalo Wings are a great source of protein. They are also lower in carbohydrates, making them a popular choice for people on special diets. By making the sauce at home, you also control the salt and sugar levels.
Can I make these in an air fryer? Yes. Set your air fryer to 400 degrees Fahrenheit. Cook the wings in a single layer for 20 minutes, shaking the basket halfway through. They will come out very crispy.
Why use baking powder instead of flour? Flour can sometimes create a bready, soft coating. Baking powder reacts with the juices of the chicken to create tiny bubbles. These bubbles increase the surface area of the skin, which makes it much crispier than flour ever could.
How do I make the wings less spicy? The best way to reduce the heat is to add more butter to the sauce. The fat in the butter coats your tongue and neutralizes the sting of the peppers in the hot sauce.
Can I use frozen wings? You can, but you must thaw them completely first. Once thawed, you must be extra careful to dry them with paper towels because frozen meat releases a lot of extra water.


