
Have you ever wondered why some salsas taste so bold, smoky, and addictive while others feel flat and ordinary? The secret often lies in one special ingredient: Hatch chiles. These famous peppers from New Mexico have a unique balance of heat, sweetness, and earthiness that makes them perfect for salsa. If you’ve never tried making your own Hatch Chile Salsa at home, you’re in for a treat.
In this post, we’ll walk through everything you need to know—from choosing the best chiles to preparing, roasting, and storing your salsa. Whether you want to wow guests at a party or just add flavor to your everyday meals, this recipe is simple, fresh, and bursting with flavor.
Overview
Print
Hatch Chile Salsa
- Total Time: 35 minutes
- Yield: 6 servings 1x
- Diet: Vegan
Description
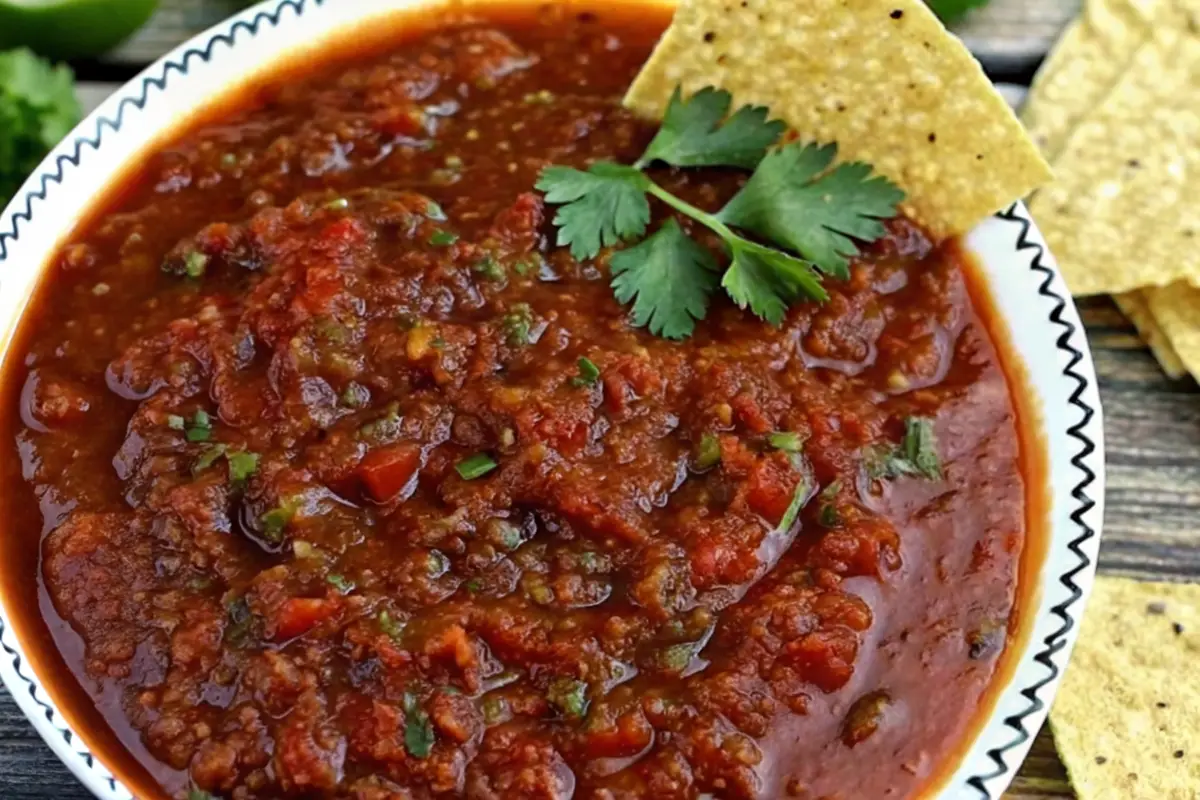
This Hatch Chile Salsa is smoky, spicy, and full of flavor thanks to freshly roasted Hatch chiles. Perfect for dipping with chips, spooning over tacos, or serving alongside grilled meats, it’s a simple recipe that delivers bold taste in every bite.
Ingredients
- 4–6 fresh Hatch chiles (mild, medium, or hot)
- 3–4 Roma tomatoes
- 1 medium white or yellow onion, halved
- 2–3 garlic cloves, peeled
- ½ cup fresh cilantro leaves
- 2 tablespoons lime juice
- Salt, to taste
- Tortilla chips, for serving
Instructions
- Roast the Chiles: Place Hatch chiles on a baking sheet under the broiler or on a grill. Roast until skins are blistered and charred, 5–7 minutes per side. Transfer to a bowl, cover, and let steam for 10 minutes. Peel off skins, remove stems and seeds, and set aside.
- Char the Veggies: Roast the tomatoes, onion halves, and garlic on the same sheet or grill until lightly charred.
- Blend: In a blender or food processor, combine roasted Hatch chiles, tomatoes, onion, garlic, cilantro, and lime juice. Blend until smooth for a silky salsa or pulse for a chunkier texture. Season with salt.
- Serve: Pour into a bowl, garnish with fresh cilantro, and serve with tortilla chips or as a topping for tacos, eggs, or grilled meats.
Notes
For extra heat, leave in some chile seeds. If the salsa is too thick, add a splash of water or lime juice. Roast on a charcoal grill for even smokier flavor. Store in the fridge for up to 5 days or freeze for later use.
- Prep Time: 15 minutes
- Cook Time: 20 minutes
- Category: Appetizer
- Method: Roasting & Blending
- Cuisine: Mexican-Inspired
Nutrition
- Serving Size: 2 tablespoons
- Calories: 20
- Sugar: 1g
- Sodium: 90mg
- Fat: 0g
- Saturated Fat: 0g
- Unsaturated Fat: 0g
- Trans Fat: 0g
- Carbohydrates: 4g
- Fiber: 1g
- Protein: 1g
- Cholesterol: 0mg
Hatch Chile Salsa is more than just a dip—it’s a versatile sauce that works as a topping, marinade, or flavor booster. The highlight of this salsa is the roasted Hatch chile, which gives a smoky depth you won’t find in regular peppers.
- Prep Time: 15 minutes
- Cook Time: 20 minutes (mainly for roasting)
- Total Time: 35 minutes
- Difficulty Level: Easy (beginner-friendly)
This recipe is perfect for anyone who wants big flavor without spending hours in the kitchen.
Essential Ingredients
Here’s what you’ll need to make the best Hatch Chile Salsa:
- Fresh Hatch chiles (4–6 peppers): The star of the recipe. They come in mild, medium, or hot varieties.
- Roma tomatoes (3–4 medium): Adds sweetness and body.
- White or yellow onion (1 medium): Balances flavor with a mild bite.
- Garlic cloves (2–3): Roasted or fresh for depth.
- Fresh cilantro (½ cup): Adds freshness.
- Lime juice (2 tablespoons): Brings brightness and acidity.
- Salt (to taste): Enhances all the flavors.
Substitutions and Variations
- If you can’t find Hatch chiles, substitute Anaheim peppers (they’re related but milder).
- For more heat, add jalapeños or serranos.
- Swap lime juice with lemon juice if that’s what you have.
- For a roasted twist, try tomatillos instead of tomatoes.
Step-by-Step Instructions

Step 1: Roast the Hatch Chiles
- Place the chiles on a baking sheet under the broiler or on a hot grill.
- Roast until the skins blister and char, about 5–7 minutes per side.
- Once charred, transfer them to a bowl and cover with a kitchen towel for 10 minutes. This helps loosen the skins.
- Peel off the skins, remove seeds and stems, and set aside.
Tip: If you like more spice, leave some of the seeds in.
Step 2: Roast the Tomatoes, Onion, and Garlic
- On the same sheet or grill, roast the tomatoes, onion halves, and garlic until lightly charred.
- This adds a smoky layer of flavor to your salsa.
Step 3: Blend the Salsa
- In a blender or food processor, add roasted Hatch chiles, tomatoes, onion, garlic, cilantro, and lime juice.
- Blend until smooth or pulse for a chunkier texture.
- Taste and season with salt.
Tip: If your salsa feels too thick, add a splash of water or extra lime juice.
Assembly
Once blended, pour the salsa into a serving bowl. For presentation:
- Garnish with a sprinkle of chopped cilantro.
- Add a wedge of lime on the side.
- Serve in a rustic bowl with tortilla chips, or spoon over grilled chicken, tacos, or eggs.
Serving Idea: Pair Hatch Chile Salsa with warm flour tortillas and cheese quesadillas for an easy snack.
Storage and Make-Ahead Tips
- Refrigerator: Store in an airtight container for up to 5 days.
- Freezer: Freeze in small containers or ice cube trays for up to 3 months. Thaw in the fridge before using.
- Make-Ahead: Roast the chiles and vegetables a day early. Blend just before serving for the freshest taste.
Recipe Variations
- Hatch Chile Salsa Verde: Use tomatillos instead of tomatoes for a tangy green version.
- Creamy Hatch Chile Salsa: Blend in ½ avocado or ½ cup sour cream for creaminess.
- Extra Smoky Salsa: Roast the vegetables on a charcoal grill.
- Sweet & Spicy Salsa: Add roasted pineapple or mango for a fruity twist.
Health Benefits
Hatch Chile Salsa is not only delicious but also packed with nutrition:
- High in Vitamin C: Boosts immunity and skin health.
- Low-Calorie: A guilt-free topping or dip.
- ** dip.
- Rich in Antioxidants: From chiles, tomatoes, and garlic.
- Fresh and Clean Ingredients: No added preservatives.
Conclusion
Making Hatch Chile Salsa at home is simple, fun, and rewarding. By roasting the chiles and other vegetables, you unlock a depth of flavor that turns ordinary salsa into something unforgettable. Whether you’re making tacos, grilling meats, or just snacking with chips, this salsa will quickly become a favorite in your kitchen.
So next time you see fresh Hatch chiles at the market, grab a bunch and give this recipe a try. You’ll be amazed at how much flavor these peppers can bring to your table.
FAQs
1. What are Hatch chiles, and why are they special?
Hatch chiles are grown in Hatch, New Mexico. They have a unique earthy, smoky, and slightly sweet flavor that makes them stand out from other peppers.
2. Can I use canned Hatch chiles instead of fresh?
Yes, canned Hatch chiles work in a pinch, but fresh roasted ones give the best flavor.
3. How spicy is Hatch Chile Salsa?
It depends on the type of Hatch chile you use. Mild ones are gentle, while hot varieties can pack a punch.
4. Can I make this salsa without roasting the chiles?
You can, but roasting brings out a smoky sweetness that makes the salsa much richer in flavor.
5. What can I serve Hatch Chile Salsa with?
It pairs perfectly with chips, tacos, grilled meats, eggs, quesadillas, and even as a marinade for chicken or fish.
6. Is Hatch Chile Salsa healthy?
Yes, it’s low in calories, full of vitamins, and made with fresh ingredients—making it both tasty and nutritious.


