Have you ever taken a bite of a sandwich so crispy and creamy that you wondered how something so simple could taste so good? A tuna melt may seem like an ordinary sandwich, but when you get the perfect crunch on the outside and a warm, ultra-creamy filling on the inside, it becomes something unforgettable. Many people think a great tuna melt takes special ingredients or kitchen skills, but the truth is that anyone can make a Crispy Golden Tuna Melt at home with just a few simple steps. This recipe will show you how to turn everyday pantry items into a sandwich that feels gourmet.

Crispy Golden Tuna Melt with Ultra-Creamy Filling (Easy Recipe)
- Total Time: 18 minutes
- Yield: 2 sandwiches 1x
Description
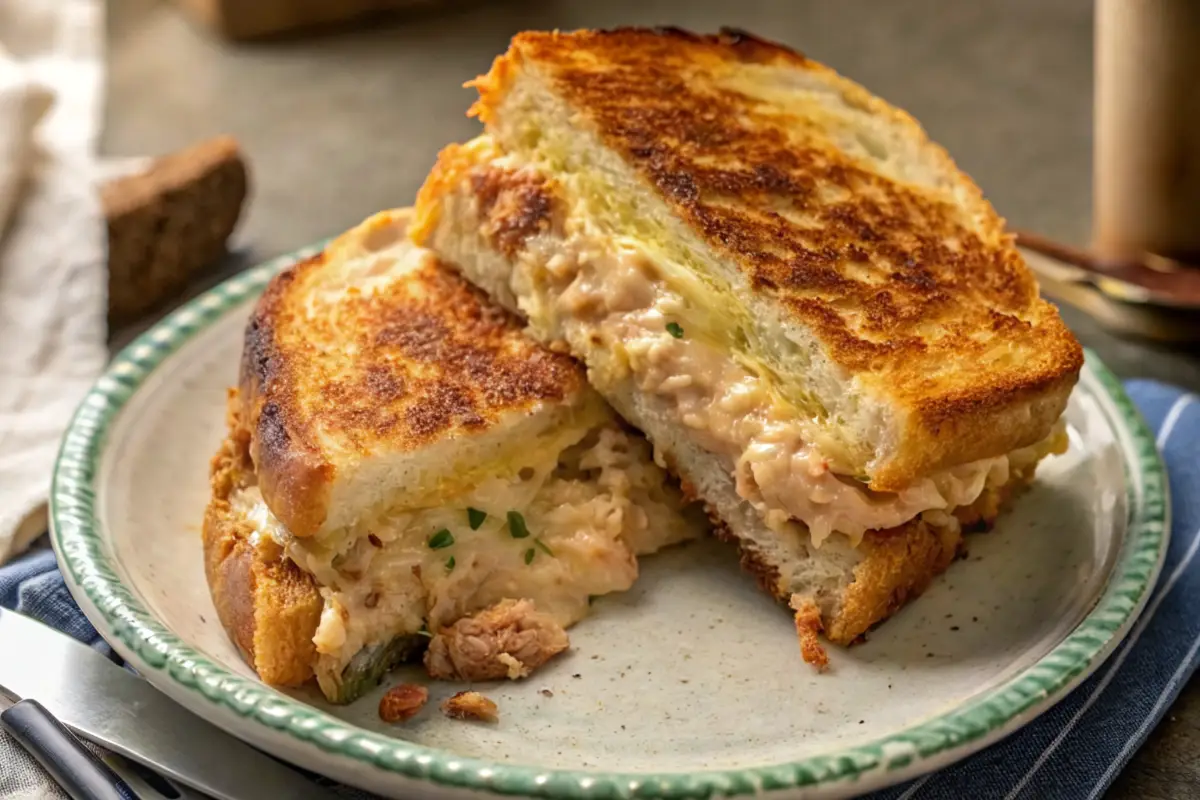
This Crispy Golden Tuna Melt with Ultra-Creamy Filling is a warm, comforting sandwich with a golden, crunchy crust and a rich, cheesy tuna center. It comes together fast with simple pantry ingredients and tastes like a diner-style classic made right at home.
Ingredients
- Tuna Filling
- 2 cans tuna, drained well
- 1/3 cup mayonnaise (or Greek yogurt for a lighter option)
- 1/2 cup shredded cheddar or cheese blend
- 2 tablespoons finely chopped red onion
- 1 tablespoon relish or finely chopped pickles
- Salt and black pepper, to taste
- Optional: 1 teaspoon hot sauce or sriracha
- Optional: 1 teaspoon lemon juice
- Optional: 1/4 teaspoon paprika
- For the Sandwich
- 4 slices thick-cut bread (brioche, sourdough, or Texas toast)
- 2–3 tablespoons softened butter
- Optional: pinch of garlic powder or dried herbs for the crust
Instructions
- Make the Tuna Filling: In a medium bowl, add the drained tuna and break it apart with a fork. Stir in the mayonnaise, shredded cheese, red onion, and relish until the mixture is creamy and well combined. Season with salt, pepper, and any optional hot sauce, lemon juice, or paprika to taste.
- Prep the Bread: Spread softened butter on one side of each slice of bread. If you like extra flavor, sprinkle a small pinch of garlic powder or dried herbs over the buttered sides.
- Assemble the Sandwich: Place one slice of bread, buttered side down, into a cool nonstick or cast-iron skillet. Spoon a generous layer of tuna filling over the bread and spread it evenly. Top with the second slice of bread, buttered side up. Repeat with the remaining bread and filling for the second sandwich.
- Cook Until Golden: Turn the skillet to medium-low heat. Cook the sandwiches for 3–4 minutes, or until the bottom is golden and crisp. Carefully flip with a spatula and cook the other side for another 3–4 minutes, pressing gently so the filling warms through and the cheese melts.
- Rest and Slice: Transfer the tuna melts to a cutting board and let them rest for about 1 minute so the filling can thicken slightly. Slice each sandwich in half and serve immediately while hot and melty.
Notes
Drain the tuna very well so the filling stays thick and creamy instead of watery. Cook the sandwiches over medium-low heat so the bread becomes deeply golden without burning while the inside heats through. For extra cheesiness, sprinkle a little more shredded cheese directly on top of the filling before closing the sandwich. Serve with chips, a salad, or tomato soup for a complete comfort meal.
- Prep Time: 10 minutes
- Cook Time: 8 minutes
- Category: Sandwich
- Method: Stovetop
- Cuisine: American
Nutrition
- Serving Size: 1 sandwich
- Calories: 480
- Sugar: 4g
- Sodium: 720mg
- Fat: 28g
- Saturated Fat: 10g
- Unsaturated Fat: 16g
- Trans Fat: 0g
- Carbohydrates: 28g
- Fiber: 2g
- Protein: 32g
- Cholesterol: 65mg
This Crispy Golden Tuna Melt stands out because it blends warm, melty comfort with a rich, creamy tuna filling tucked inside perfectly toasted bread. The crispy exterior gives the sandwich its signature bite, while the creamy center creates a smooth and flavorful contrast. It takes only about 15 minutes from start to finish, making it perfect for busy days, quick lunches, or late-night cravings. Even beginners can make this melt with ease, since the steps are simple and the ingredients are easy to find. Whether you want a comforting meal or a satisfying snack, this tuna melt checks every box.
Essential Ingredients
These ingredients create the perfect balance of crisp, creaminess, and flavor.
For the creamy filling
Canned tuna in water or oil
Mayonnaise for creaminess
Shredded cheese such as cheddar, mozzarella, or a blend
Red onion, finely chopped for texture and flavor
Pickles or relish for tang
Salt and pepper
Optional ingredients:
A dash of hot sauce or sriracha
Green onions
Paprika
Lemon juice
For the bread
Thick-cut bread such as brioche, sourdough, or Texas toast
Softened butter for spreading
A little garlic powder or herb seasoning if you want more flavor
Ingredient Substitutions
Instead of tuna, you can use canned chicken or salmon.
Greek yogurt can replace some or all of the mayonnaise.
Vegan cheese and vegan mayo work well for dairy-free versions.
If you do not have red onion, use white or green onion.
Step-by-Step Instructions
1. Prepare the tuna filling
Drain the tuna fully, pressing out the liquid so your filling stays thick and creamy rather than runny.
Add the tuna to a bowl and break it apart with a fork.
Mix in mayonnaise until the texture becomes creamy but not too thin.
Stir in shredded cheese. The cheese will help bind the filling and melt beautifully when heated.
Add chopped onions, seasonings, and any optional ingredients.
Mix until everything is well combined.
2. Prep the bread
Spread a thin layer of softened butter on one side of each slice of bread. This will create the crispy golden crust when the sandwich cooks.
If you want extra flavor, sprinkle a little garlic powder or dried herbs onto the buttered side.
3. Preheat the pan
A non-stick skillet or cast-iron pan works best.
Heat the pan over medium-low heat. Cooking low and slow helps the bread turn golden without burning while giving the filling time to warm through.
4. Build the sandwich
Place one slice of bread, butter side down, into the warm pan.
Spoon a generous amount of tuna filling onto the bread. Press it down gently so it spreads evenly.
Place the second slice of bread on top, butter side up.
5. Cook to crispy perfection
Let the sandwich cook until the bottom slice is golden brown. This usually takes 3 to 4 minutes.
Flip the sandwich carefully using a spatula.
Cook the other side until it becomes crispy and golden and the cheese inside begins to melt.
Press lightly with the spatula to help the filling warm through.
6. Slice and serve
Let the sandwich rest for one minute before slicing. This helps the filling thicken slightly and prevents it from spilling out.
Slice in half and serve warm.
Assembly Tips and Presentation
A thick filling makes the sandwich more satisfying, so do not be afraid to stack it generously.
If serving to guests, place the sandwich on a wooden board and cut it diagonally to show the creamy layers inside.
Pair it with chips, a fresh salad, or a warm bowl of soup for a complete meal.
For a restaurant-style look, brush a light layer of melted butter on top right before serving.
Storage and Make-Ahead Tips
Store leftover tuna filling in an airtight container in the refrigerator for up to three days.
Do not assemble the sandwich until you are ready to cook it. This keeps the bread from getting soggy.
If you want to meal-prep, mix the filling ahead of time and toast the sandwich fresh.
Cooked tuna melts taste best fresh, but you can reheat them in a skillet over low heat to bring the crispiness back. Avoid microwaving, as it makes the bread soft instead of crispy.
Recipe Variations
Spicy Tuna Melt
Add jalapeños, spicy mayo, or crushed red pepper flakes to the filling.
Mediterranean Tuna Melt
Use olives, sun-dried tomatoes, and feta cheese in place of the usual mix.
Smoky Tuna Melt
Add smoked paprika or a bit of chipotle sauce for bold flavor.
Veggie-Packed Tuna Melt
Mix in diced celery, bell peppers, or spinach for added crunch and nutrition.
Open-Faced Tuna Melt
Skip the top slice of bread and broil the sandwich with cheese on top for a classic diner-style version.
Conclusion
A Crispy Golden Tuna Melt is more than just a sandwich. It is a warm, comforting meal that is simple to make yet rich in flavor. With a crunchy exterior and a creamy, melty interior, it delivers the perfect balance of textures. This recipe is flexible, quick, and ideal for any time of day. Once you try it, you may find yourself making it again and again. Do not be afraid to customize it and make it your own, because great food should always fit your tastes.
FAQs
What type of tuna works best for a tuna melt?
Chunk light tuna or solid white albacore both work well. The key is to drain it well so the filling stays thick.
How can I make the tuna melt healthier?
Use whole wheat bread, replace some mayonnaise with Greek yogurt, and add extra vegetables.
Can I make the filling ahead of time?
Yes. The filling can be made up to three days in advance and stored in the refrigerator.
Why is my bread burning before the cheese melts?
Your heat is too high. Lower the heat and cook slowly so the outside crisps while the inside warms through.
Can I add more cheese?
Yes. Extra cheese makes the filling even creamier and helps bind it together inside the sandwich.